For quick contact: +90 532 288 2200


Dew-Drop printing on fabric by Ünlü Transfer. The product listing sets a 10 m sample and 100 m order minimum. Check dot spacing and usable width.
Dew-Drop printing gives selected spots on a fabric a decorative droplet appearance. The result depends on the size and spacing of the marks, the texture of the ground and the way the textile moves. An isolated dot may catch light as a sleeve bends. A close group can read as a continuous pattern from across a room. Start a sample brief with the parts that need to remain distinct, the distance from which they will be seen and the areas where you want the base fabric to show.
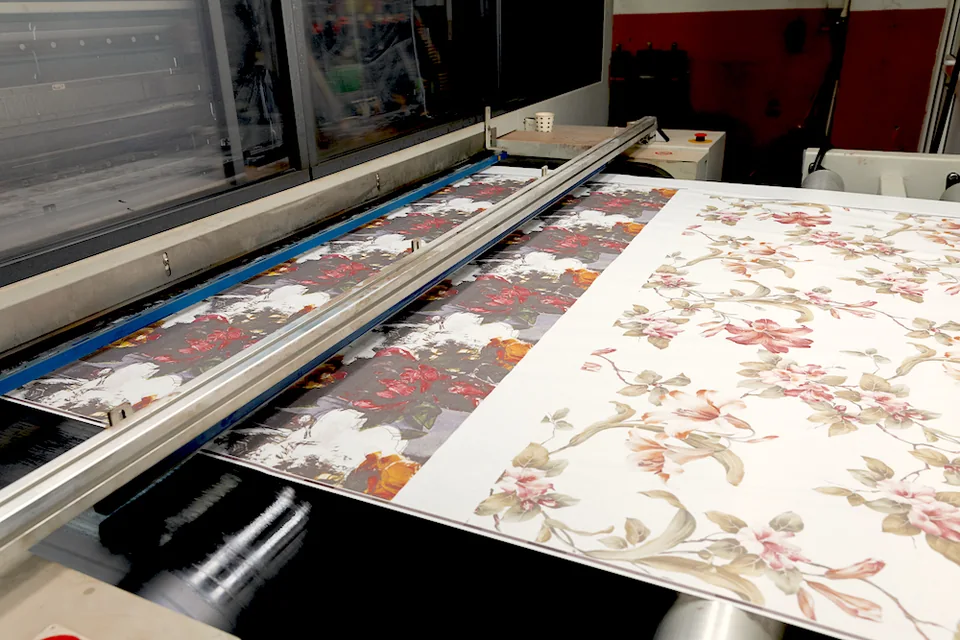
The cover comes from Ünlü Transfer’s production archive and shows a fabric processing line. Keep a photograph of your own finished sample with the approval record. A physical cutting is useful when the same picture looks different on different screens.
Put the droplet areas on their own artwork layer and label it clearly. Mark the largest spot, the smallest spot and the narrowest gap. Give the repeat size in both directions. If one line must stop before a seam or fold, show exactly where its visible edge should end. An artwork preview may be enlarged to show detail. Include a dimension or a full scale drawing so the operator and the person approving the sample are looking at the same intended layout.
Decide how much of the background should remain visible between the marks. A tight cluster can draw the eye to one part of a garment. Wider spacing can carry a design over a larger panel. Ask for both spacings on the same cloth when you are deciding between them. Keep the dot diameter or shape consistent in that comparison. When several dimensions change at once, document each candidate with its own code so the sample can be identified later.
A droplet layout draws attention to individual marks and the space between them. Foil creates a metallic appearance on chosen areas. A lacquer effect can give a selected part of the design a glossy finish. Embossing gives the surface raised or recessed forms. Compare effects on the same production cloth at the same scale. Include a broad area and a thin line in the trial so the team can look at each finish from a normal viewing distance and then inspect the edge close up. Lacquer-effect printing · Fabric embossing.
Supply the fibre composition, knit or weave, weight, colour, roll number and any known finishing treatment. Keep an untreated cutting from the same roll. Mark the face and length direction of each piece before it goes to the supplier. A dark smooth weave may show a fine dot differently from a soft knit of a similar colour. A comparison of a single finished cutting with the original cloth helps the team identify what changed during the process.
If two ground fabrics are under consideration, give both their own material references. Hang the untreated and finished cuts in the same orientation and compare the fall of the cloth. Record the look and the handle separately. If the production rolls have different lots, agree which lots require separate trials. When an acceptable design moves to a different base, a new sample can confirm the outline, movement and feel of the dots on the revised fabric.
Some projects combine a coloured fabric print with a decorative droplet pattern. Give each layer its own artwork reference. Choose a point where the effects must line up, such as the edge of a thin stripe, the centre of a motif or the start of a repeat. Mark the cut line and seam allowance if the motif crosses a panel. Ask the supplier to confirm the sequence of the proposed operations and use the trial to examine the two layers on the finished cloth. Fabric printing methods.
When a pattern continues from a dark ground to a light one, include both colours in the trial. Save the revision used for the ground next to the revision for the droplet layer. If a spot appears out of place, examine it first on the flat cutting and then on the sewn join. An accurate photo and a dimension beside the mark help the supplier see whether placement or the pattern itself needs adjustment.
Lay the sample on a neutral surface and inspect the pattern straight on. Tilt it under the same light to see how the brightest spots and the smallest gaps read. Then hold the fabric as it will sit on the product. A shoulder, lapel and skirt hem bend in different ways. Take one photograph that shows the overall spacing and another of the most important detail. Use the same viewing distance and light for the matching photograph of each variant.
Choose a centre point, the narrowest gap and a point near the fabric edge. Mark those places on the approved sample and drawing. For alternating 3 and 6 millimetre dots, check that both outlines show at the intended scale. Set a scale beside the surface when taking a close photograph. The three positions give the design and production teams specific places to revisit if the first roll appears different from the approved cutting.
Check the distance from the dots to the seam and make up a short section using the planned thread and lining. If a dot falls on the fold, look at the motif before and after assembly. A dark outer and pale lining can produce a different impression from a dark outer on its own. View the face and the edge under the same light. Keep notes on thickness at the join, the feel of the finished area and the way the panel hangs when released.
For an elastic garment, inspect the chosen part at rest, in its normal direction of stretch and after release. Mark the direction on the cut so others can repeat the observation. On an elbow or pocket opening, check the portion of the motif that will receive repeated movement. If a revision is needed, record the current size and placement before changing one feature. The next sample can then be checked against the original at the same point.
Identify sections that meet a pale lining, another garment panel or the opposite finished face during use. Test arrangements can be discussed with the supplier based on the garment and its proposed care. Keep observations of colour transfer, appearance and surface feel in separate lines. Use identifiable points on the motif for the before and after views. Record the lot and artwork revision with the result so a change to either can be considered before using the same approval. Label the lining contact face.
Agree whether the processed fabric will arrive as rolls, folded cloth or separate panels. For a folded delivery, sample the expected contact between decorated faces. Open the package and inspect the fold line and the areas that remained together. Record the time, position and changes that can be seen when the cloth is opened. For a roll, identify which face goes outward and how the keeper cutting and roll code will be linked. Discuss the handling and storage of a separate reference sample with the cutting team.
Ünlü Transfer’s Dew-Drop product listing gives a 10 metre minimum sample, a 100 metre minimum order and a maximum processing width of 150 cm. The listing shows 7 days for a sample and a 14 day lead time. Confirm the fabric, usable cutting width and schedule for your project. If you supply the cloth, include the roll lengths, lot numbers and dimensions. Identify quantities by design and ground colour and give the amount of finished fabric needed.
Include the artwork revision, the width that must remain available for cutting, the dimensions of the smallest dot and the requested delivery format. Tell the supplier how much material is available for preparation and sampling. Give the latest date for approval and the date when the finished goods are needed. Ask how the quote presents sampling, decorative work and any colour printing already planned for the base. Keep those items with the approved layout so buyers can compare offers for the same result.
Two panels of 72 centimetres placed side by side require 144 centimetres of usable cloth. A maximum processing width of 150 centimetres leaves room for margins in some layouts. The motif still needs to start at the agreed position and stay inside the area available for cutting. If one quote uses 146 centimetres of usable width and another uses 142 centimetres, price per metre alone gives an incomplete comparison. Ask the supplier to work with the same cutting plan and finished quantity. Include the start of the repeat and the direction of the cloth.
Record any width set aside for edge protection or processing. If the work will be split across fabric lots, note which roll will supply the approval cut. For every design variant, the quote can show the input length and the usable output separately. The final roll width, direction and visible limits of the pattern belong on the cutting note.
Suppose a dark jacket has a spaced dot pattern on a 24 centimetre repeat and a pale lining. Give the fabric specification and lot, the usable width and the metres needed for every colour. Mark where the dots meet the pocket edge. Ask for a cutting that includes the narrowest gap, a full repeat join and a section of the pocket seam. Supply an untreated reference of the same cloth. Sew a short pocket section with the proposed lining and review the sample with the people who will approve the production run.
If the first trial loses a row of dots at the pocket fold, show the area on the pattern and label the file revision. A change near that seam can be assessed on a smaller cut while the team retains the approved reference for the rest of the motif. Record the expected length and position of the new line. When the revision arrives, check both the modified part and the surrounding pattern under the same light.
Cut a reference piece from an identifiable position on the first roll. Check the roll number, cloth direction, artwork revision, dot edges, repeat join and placement near the usable edge. Use the same light and positions as at approval. If an observation is specific to a short section of the roll, record the approximate distance and the position across its width. Keep the sample, photo and measurement together so another person can find the same point.
Put the appearance decisions and the cutting dimensions on the same approval card. Identify who signed off the colour and who checked the usable width. When a packing or material change is proposed, record which previous observations the team needs to repeat. The approved cut, styled sample and first delivery can then be read against the same requirements.
Give the cutting team a copy of the signed layout plan. To discuss the next collection, see Ünlü Group’s fabric surface treatments. Send the fabric reference, artwork dimensions, intended dot effect and finished quantity with your sample and quote request. If you want to compare two bases, list the quantities separately.
phone: +90 212 576 5250
fax: +90 212 493 0336
email: info@unlutransfer.com
Yenidoğan Mah. Eser Sok. No: 6-8
Bayrampaşa, 34030,
Istanbul / Turkey
TR 9150171175
Bayrampaşa Tax Office