For quick contact: +90 532 288 2200


Mark where the pleats are held and where they are free. Check the outer panel, closure and lining in order during the fitting.
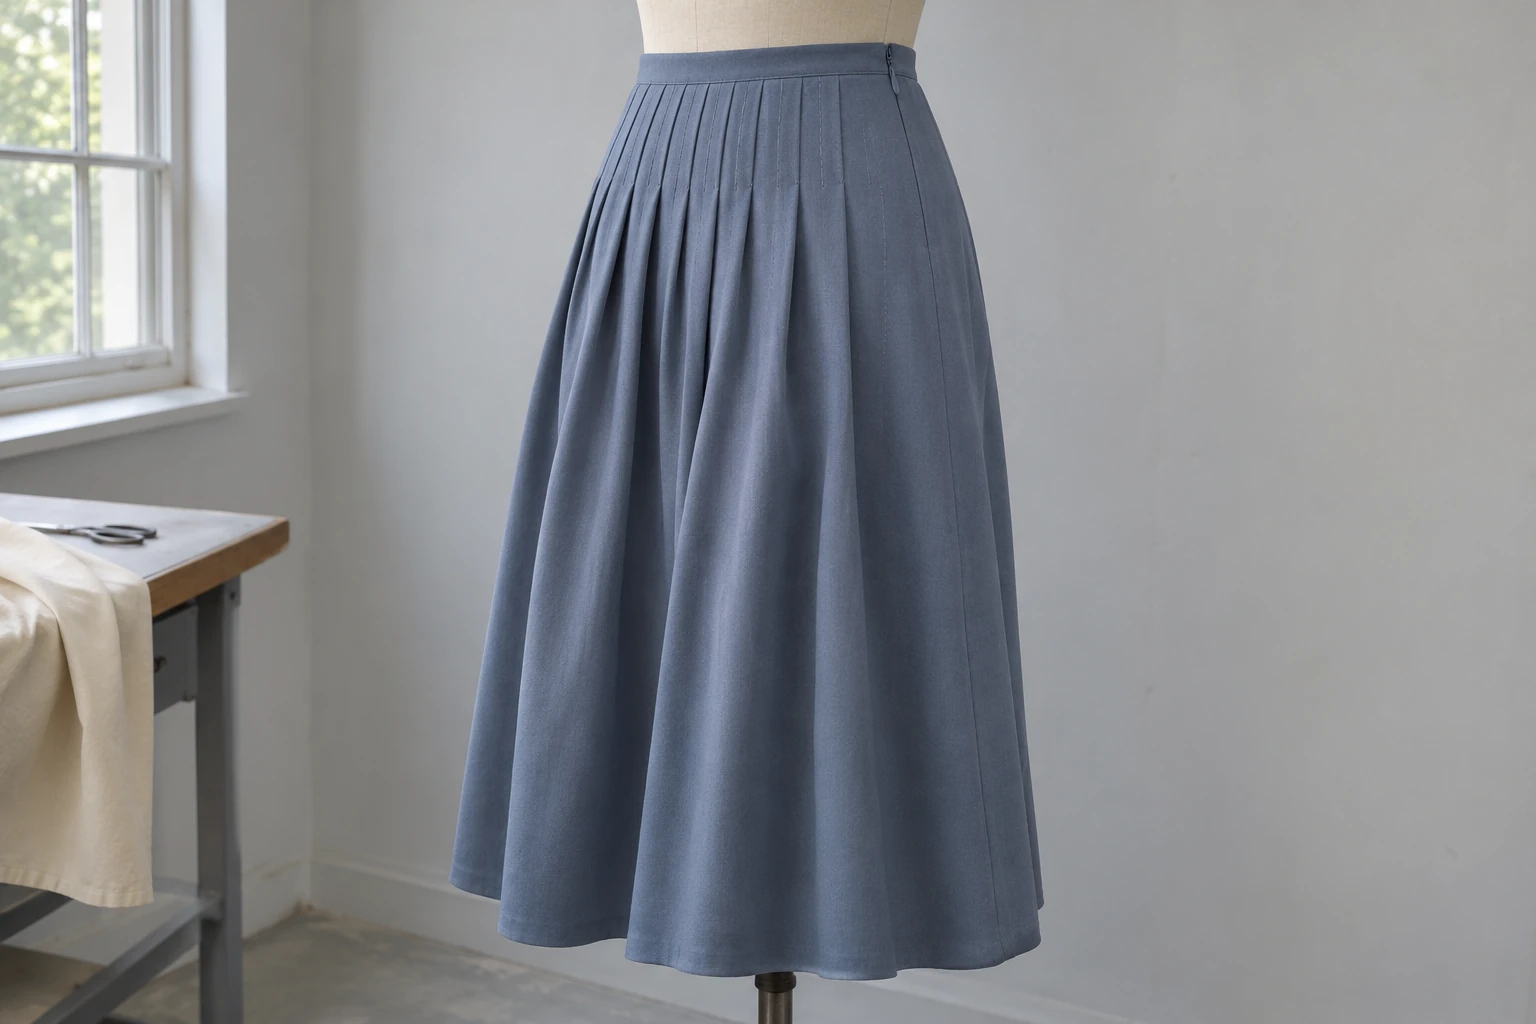
On the pattern, mark the part of the pleat held by stitching and the point where the cloth becomes free to open. Then check the skirt in three stages. Fit the outer panel with the intended waist and side seams. Add the zip and observe the folds beside the slider and below its lower end. Add the lining and repeat the same movement. This makes it easier to see which part limits the opening and whether a step is made possible by cloth unfolding or by the fabric itself stretching. Check the appearance on the table and the behaviour when the garment is worn.
Consider a slate blue knife-pleated skirt designed to sit smoothly at the waist and open towards the hem during a step. A short line of stitching below the band can keep the upper part close. The outer skirt may move freely in the first trial and pull earlier after a short lining attachment is added at the side. In another trial, the lining moves easily but the slider catches where several layers meet. Those findings lead to different changes. Record when the difference first appears and show where the cloth is held, where the stitching ends and where the fold releases.
Draw the waistband seam, the fold edges and the side seam separately. The waistband seam catches the top ends of the folds. If the folds will also be stitched down vertically, show where that stitching begins and ends. Give the height at which you want the cloth to open. Keeping the same stitched length on two neighbouring pleats can give the front a regular appearance. If the side or back needs a different release point, mark it on its own pattern piece. The sample room should be able to identify the held area, the free area and the closure line on the approved drawing.
During the fitting, distinguish the opening of a fold from the stretch of the cloth. Even a fairly stable woven fabric can give more width when material tucked beneath the face of a pleat unfolds. A stretch fabric may also extend. The seam and the zip tape may extend differently from the cloth. Observe how the pleat moves with the waistband in place and the wearer taking a normal step. A close view of the cloth at the start of that movement can show whether the crease releases first or whether a line of tension appears beside the stitching.
Support the outer panel at the intended waistline and leave centre front and the side seam easy to find. If the zip has yet to be inserted, hold the opening at the planned closed dimension using the fitting setup. A larger waist opening in this first trial can make the skirt appear freer than it is at the correct waist size. Keep the intended waist, hip and skirt length consistent as you add the components. Record where the waist is held and how the unlined shell opens. That gives you a reference for later fittings with the closure and lining installed.
Longer vertical stitching below the waistband can move the first free opening farther down the skirt. That may be appropriate when the waist and hip should stay close. If the wearer needs more movement around the knee, check where the lowest stitches end in relation to that movement. Try the planned held length with a basting line and leave the lower part free. Compare the same area from the front and side. Record the last stitch and where the cloth first starts to open. Even when the drawing is symmetrical, the side seam or layers behind the pleats can influence how one fold behaves.
A seam in a valley between the pleats can sit discreetly. Check where its allowance lies inside the garment and watch what happens when the neighbouring folds open. If a side seam turns towards the front, review the adjoining panels and the thickness at the seam. A stitch that catches an extra layer can hold a fold that was intended to be free. Look at the inside as well as the shape on the outside. Mark which layer is meant to be caught before altering the pleat depth. The next sample can then repeat the same pattern with a different seam treatment and show which change made the difference.
Pay particular attention where thick sections meet. A waistband, side seam, pocket opening or lining attachment can share the same height. A line lying flat on the table can roll to the outside when the skirt is supported at the waist. Compare the material directly on both sides of the seam and see whether the hem also changes direction. If two stitched lengths are being considered, use the same finished waist and hip measurements in both trials. A change in those measurements can affect movement independently of a change in the stitch length.
Show the start and end of the zip on the pattern. With the zip closed, look for both waistband ends meeting at the intended height. Open and close the slider while checking the inside. A lining edge, loose thread or layer from a fold can enter the slider path. Check points where several layers come together, including where the waistband seam meets the closure. If there is tension between the two sides, review the dressing opening, fit and choice of zip together. The positions of the stitching and the lining edge need to suit the zip and the thickness of the assembled cloth.

Check the closure on the table and again with the skirt supported at its proper waist size. If the slider catches at one point, inspect whether it touches the lining, the fold allowance or the stitching. There can also be a restriction below the zip even when the slider moves freely. Check where the seam continues beneath the closure and which fold is held there. If diagonal pull lines remain with the zip closed, verify the finished waist and hip measurements. When those lines are already present on the unlined shell, start with the outer panel and the closure construction.
A short plain area beside the zip can give the tape a flatter place to sit. It may alter the appearance of the first pleat, so show that change across the full panel. Moving the first fold beside the closure changes a smaller part of the layout than shifting every fold. Mark the seam allowance and plain area separately on the pattern, then check the position at the waist and where the folds resume below the zip. Try the approved arrangement with the actual zip and final stitching. Record smooth operation and the outer appearance as separate observations.
Include putting the skirt on and taking it off in the fitting. An opening may look adequate on the table yet need more room to pass over the hips. See how the two edges come together before the slider is moved. If the wearer has to pull the edges tightly together, review the opening and the fit with the pattern maker. That finding concerns the garment even if the zip runs freely on the table.
Treat the lining as an inner piece with its own measurements. Even when it shares the waist and zip with the outer skirt, it needs room for the wearer's hip and stride. Pleats in the outer cloth can open while a narrow lining reaches the limit of its movement. Check the lining circumference, the lower edge and its attachment points. Then try the same step and seated position with the lining fitted. Identify where you first see tension, whether at the upper seam, an attachment at the side or the lower edge. Compare that point with the movement of the outer folds.

In this example, the lining has a separate free hem that ends above the outer hem. This gives the two edges room to move independently. Check the lining width, the position of any vent and the reach of any attachment at the side as well as the length. Look from the front and side to see whether the lining becomes visible in movement. If the lining appears free at rest but pulls to the side in a step, identify its first point of tension before changing the hem length. A change where the lining is held may have a different effect from shortening the lower edge.
Additional fabric beside the closure can get in the way of the slider. If the edge of the lining sits in a neighbouring fold, it can also create a small ridge on the outside. Mark the lining attachment and the closest pleat separately. Try the slider with the cloth relaxed and check it again with the skirt on the intended waist and hip. If more movement is needed, see where it can be added in the lining piece while leaving a clear path for the slider. Assess the result on the assembled fitting sample.
Compare the outer panel, the shell with the zip and the complete lined skirt at the same finished measurements. If the skirt opens in the first trial and pulls only on the zipped side in the second, inspect the bottom of the closure and the adjacent join. If the movement changes once the lining is installed, check its measurements and attachment points. Repeat an ordinary step and, where relevant, a seated position. A dress form shows the resting shape. A fitting on the intended size shows stride and sitting room. Record the starting position and support so a shifted waistband does not look like a pleat fault.
Watch where the movement changes first. A short lining attachment can pull a fold inward near the hem even though the upper seam looks smooth. Make one targeted change to the trial construction and repeat the same movement. See whether that restores the opening without exposing the lining or creating a bulge elsewhere. If the effect is slight, repeat the normal step and see whether the cloth returns to its starting position. Keep that comparison if you later try a longer stride. Track the same part of the skirt through every view.
Keep the points used to compare the stages visible in the notes. For example, record the height of the side seam at the start of a step and where the first free pleat opens below it. The next fitting can then begin with a clear view of the same area.
On the approved sample, link the waistband seam, the end of the held section, the side seam, both ends of the zip and the lining attachment and free edge to the same drawing. Identify the version shown in the closed, inside and movement views. Repeat the staged checks if the pattern size, fabric or closure changes. When there is a difference, the record should show where it starts and which component was added before it appeared.
phone: +90 212 576 5250
fax: +90 212 493 0336
email: info@unlutransfer.com
Yenidoğan Mah. Eser Sok. No: 6-8
Bayrampaşa, 34030,
Istanbul / Turkey
TR 9150171175
Bayrampaşa Tax Office