For quick contact: +90 532 288 2200


Compare a washed pigment print with an unwashed match. Check colour in the print, staining on adjacent fabric and surface marks around folds.
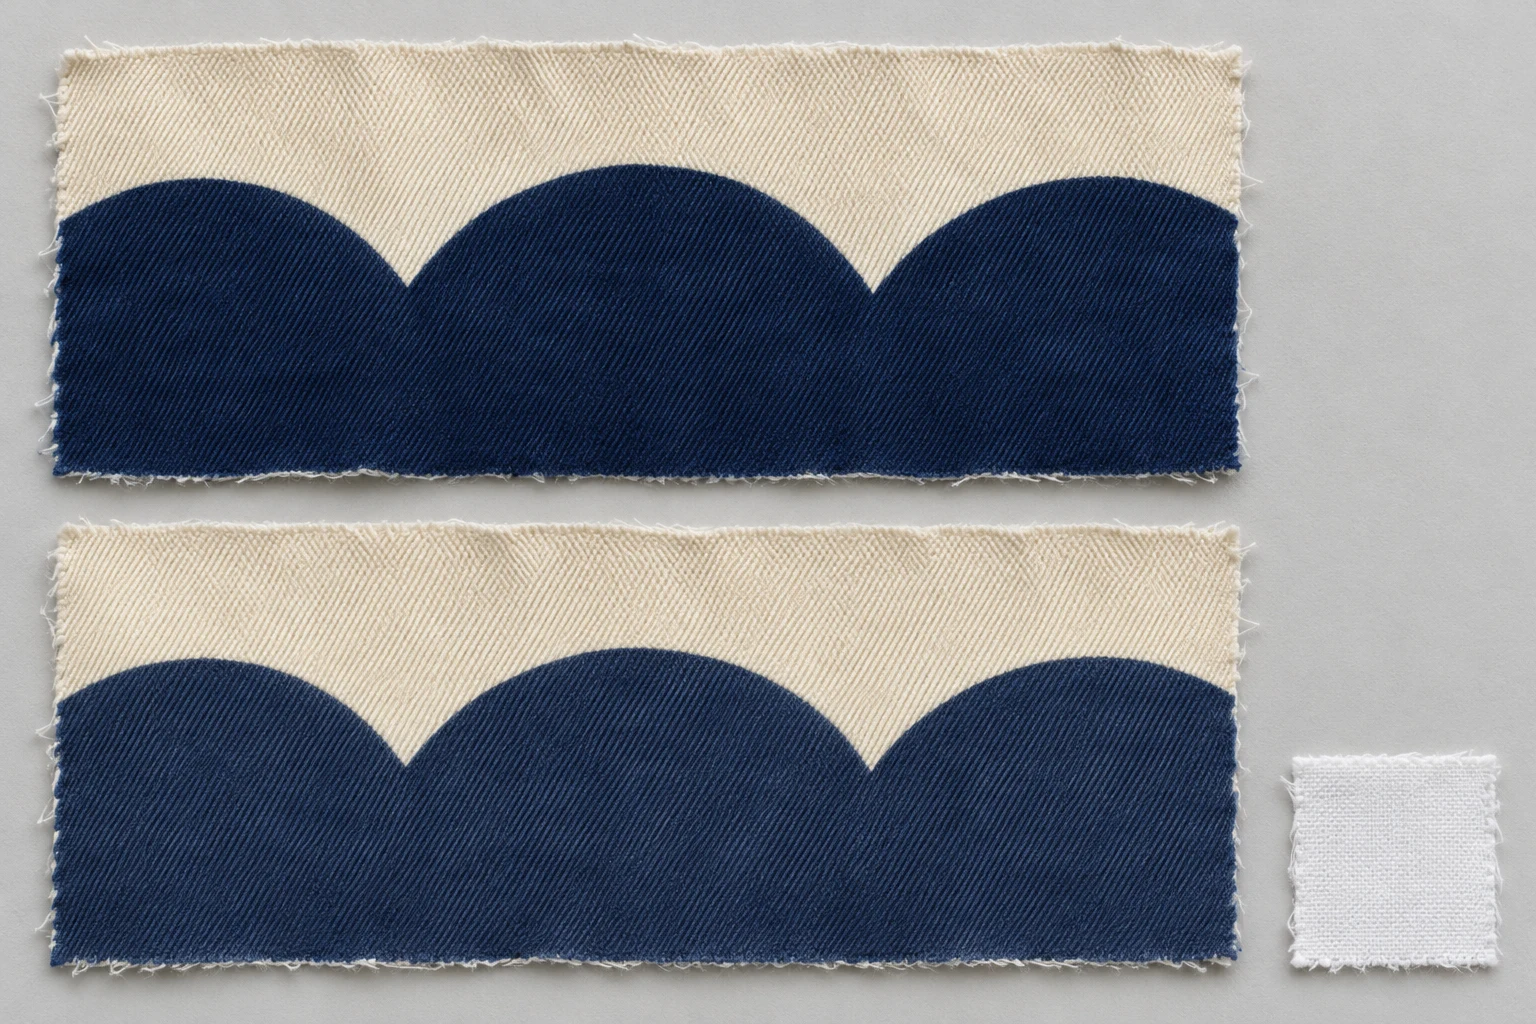
After the fabric has dried, compare a broad printed field with its matching unwashed sample. Next, look for a new tint on the light fabric that sits next to the print. Finally, look closely at any pale line or change in texture near a fold, seam or edge. Record the position and appearance of each change. A pigment print can become lighter across the whole design, leave visible colour on an adjacent fabric or show a local surface change. You can see several of these findings on the same garment, and each gives the supplier a different question to investigate.
Consider a warm white cotton with dark blue leaves. After washing, the blue may look a little less saturated across the front of a blouse. A white pocket facing may also have a faint blue tint at one edge. A close view of the cuff may show fine pale fibres along a crease. A note that says “the print faded” captures only part of what you saw. A note that identifies the front, the facing and the cuff gives the production team three places to check.
Choose two pieces from the same fabric and the same print lot. Use matching repeats and mark the locations you plan to compare before you cut them. One piece will remain unwashed. The other will go through the agreed care or test procedure. Include a large area of colour, an edge of the motif and some unprinted ground on both pieces. Two shades of blue can look similar at a glance even when they were different in the original artwork. Matching the exact parts of the repeat makes the result easier to read.
Set aside a piece of any pale material that will touch the print in use or in the wash. That could be a lining, a pocket facing or a contrasting panel. Keep the unprinted areas of the main cloth and the separate fabric references identifiable. If a blue mark appears, it matters whether it sits on an unprinted part of the original cloth or on a different material attached to it. Label the saved references outside the areas you will look at and keep them in a condition that allows a later comparison.
Agree on the care conditions with the supplier or quality team before the wash. For an internal care trial, record the programme, detergent, number of washes and drying method. For a laboratory result, agree on the applicable method, specimen arrangement and acceptance requirements. Prepare the samples for comparison once the washed piece is fully dry. A damp cloth may look much darker and its surface can lie differently. Give the two pieces comparable surroundings and lighting before you judge a small change.
Photograph the fabric before the trial, especially if a seam or pleat matters. Take a view that shows where the detail sits and another close enough to make it visible. A fold line may already have been present after pressing or after the pieces were stored. The initial view is useful when you later need to ask where a new line came from. Write down whether you tested a loose swatch, a sewn panel or a complete product. The exposed raw edge of a small swatch and a finished seam can behave differently.
Lay out the dry pieces with the same face up and with the yarns or print aligned. Look first at the general effect across a solid field. Does the dark blue look lighter throughout? Has the hue changed? Does the print look duller even though the dark and light areas still have much of their original contrast? Then look for a narrow band or a local change that interrupts the overall appearance. Make a separate entry for a pale line on a fold and an even change across the print.
Compare the unprinted ground as well. Washing and drying can change the way the cloth lies and reflects light. Look at the pieces under the same conditions and turn them together. If the visible difference follows a shadow as you change the viewing angle, record what happened. If the base looks brighter and the blue looks duller in every position, describe both changes. The unprinted side of the design gives the rest of the team a way to judge whether the change affects the entire cloth or appears mainly in the printed area.
Keep both pieces in one frame if you take a photograph for a supplier. A phone may adjust exposure or white balance between separate frames. Use a general view to show where you would examine or measure the colour, and keep the physical sample available. For formal approval, ask the laboratory how the colour change of the specimen will be reported. A general photograph is a way of locating a difference, while a test result depends on the chosen method and the comparison conditions.
If the same shade covers several panels, review the largest relevant area and the place where two panels meet. An even change can be more apparent when a panel sits beside a piece from another lot or another material. The opposite situation also occurs. You can see a change on a tiny folded swatch that attracts little attention when the same surface is laid out as it will be used. Put the sample observation into the context of the product, including its relevant colours and the normal viewing distance.
Pick a broad printed area away from a fold or seam for the first comparison, if the design allows. Then look at the same colour closer to the fold. When both areas have a similar appearance, you have a better description of the overall change. If the change becomes more pronounced near the edge, save both areas so the review can account for location. Use matching flat zones if washing changed the shape or introduced wrinkles. Stretching one piece flat may change the appearance you are trying to document.
A surface change can be concentrated at a crease, seam, projecting edge or other area of repeated contact. Look at the dry sample at rest before bending it into another shape. Move the light or turn the sample and observe whether the pale line remains in the same place. With a close view, look for lifted fibres, exposed yarns or a visible interruption to the printed surface. A pale line can also be the result of the cloth bending into the light. Record what you can see and leave the cause for a comparison that reproduces it.

Check the same area on the unwashed piece. A motif can contain a small pale interruption from the start. A line left by a packing fold can also be present on one piece before the wash. If the change is beside a seam, check a matching unsewn field on the same piece. If you ask the supplier to reproduce the effect, say which seam or fold the second sample needs to include. A flat piece from elsewhere on the roll may never show the surface you are trying to investigate.
For a photograph, keep the cloth close to the position in which the effect was first noticeable. A tightly pinched fold can make raised fibres much more prominent. Show the surrounding shape in a second view so the close-up can be placed on the sample. When the finding is unclear, a useful description might say that a thin lighter line remains visible when the cuff lies flat and becomes more evident when it bends. That description gives a printer a repeatable way to look at the same area.
Compare the unprinted part of the source cloth and any pale component that sits next to it. Line up the washed and unwashed pieces of the pale component under the same light. Does a new tint appear on the side facing the print, across the whole piece or in a distinct band? If the two pale fabrics look generally different, review the initial samples and make sure they are the same material. Discuss with the quality team whether a pale piece laundered separately under comparable conditions would help interpret the change.

A print can appear close to the original shade while an adjacent pale swatch shows a slight change. It can also look noticeably different while the pale swatch looks the same. Keep the colour change of the print and the staining of the adjacent fabric in separate parts of the record. Describe the mark in relation to the specimen that received it. Its appearance alone does not establish when the colour moved or how it got there.
Think about the construction if staining on a white collar or lining would affect approval. A single white coupon may give limited information about a second pale material with a different weave or finish. Include the actual facing, lining or trim relevant to the question. If you see a hint of blue only along the edge that was next to the print, identify that edge in the photo and in the request. A diffuse tint across the whole piece may call for a different comparison with the original fabric.
Write one short finding for the change in the print, one for any mark on adjacent fabric, and one for the surface around a construction detail. Include the lot, sample code, care and drying conditions and location of each change. For instance, the front panel looks a little duller across the whole blue area, the pale pocket facing shows a blue tint along one edge, and the cuff crease shows a thin light line. Include one overall image and a close view if a mark is difficult to find.
Decide which change affects the product. For a broad colour difference, compare with the approved colour reference and confirm the conditions used for viewing or measurement. For a mark on a pale panel, supply a piece of that panel and show which part contacts the print. For a fold line, provide a sample with the actual construction and locate the line on it. Keep the underlying fabric and design comparable if you want the next trial to tell you which condition changed the result.
When two washing procedures appear to give different results, check that the two pieces started in the same condition and were compared once they were dry. Send the photographs with the record of both care procedures. If the review calls for several stages, record when you first noticed each change. A fold line may be visible at one stage and a more general shade difference at a later one. The timing helps the supplier choose an observation to repeat without drawing a conclusion solely from the last photograph.
A new fabric lot deserves its own unwashed reference. If one lot was already warmer or lighter before washing, comparing only the washed pieces will mix the original difference with the effect of care. Look at each washed sample beside its own initial reference first. Then compare the findings across lots. If a formal report is needed, specify both the evaluation of colour change and the evaluation of staining. Include the surface appearance requirement if the product also needs a decision about seams or folds.
Keep the approved print, the matching unwashed fabric and the relevant pale component together. That set lets you return to the same evidence if the fabric lot, garment assembly or care requirements change. When you review the available fabric printing options, include the print colour, the pale material and the product area that needs particular attention in your sample request.
phone: +90 212 576 5250
fax: +90 212 493 0336
email: info@unlutransfer.com
Yenidoğan Mah. Eser Sok. No: 6-8
Bayrampaşa, 34030,
Istanbul / Turkey
TR 9150171175
Bayrampaşa Tax Office