For quick contact: +90 532 288 2200


Measure the same repeats open and folded. Use the ratio, seam allowances and usable cloth width to plan how much to cut.
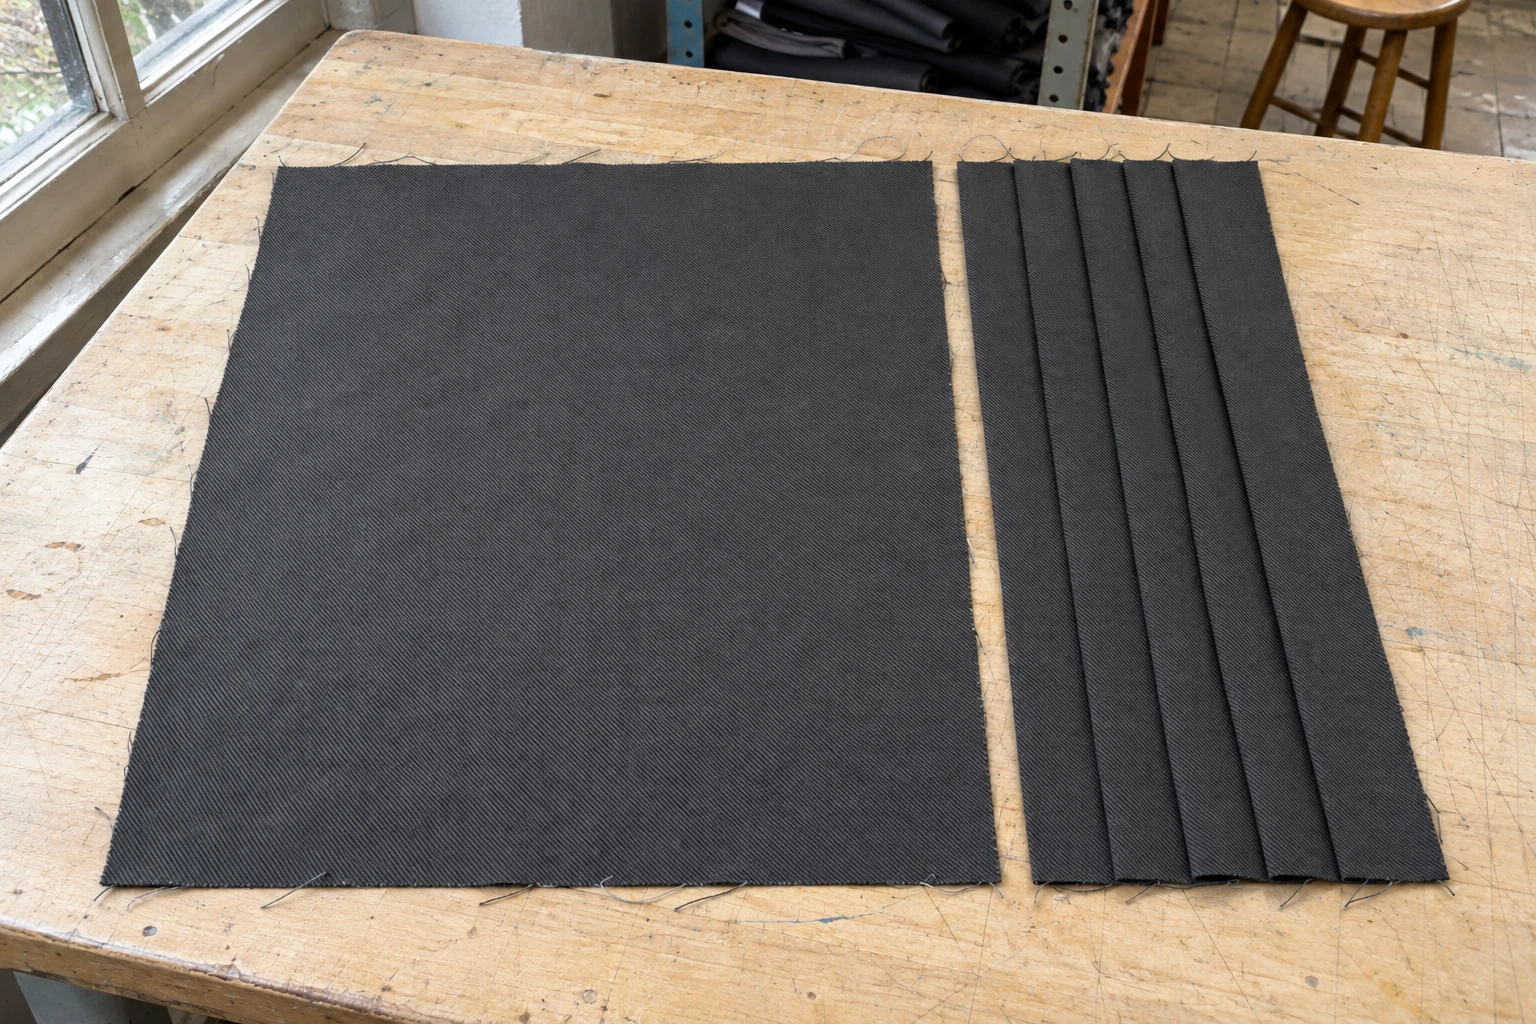
Measure the same section of fabric in two states. Take its open width before pleating, then take the width between the same marks with the pleats in place. Divide open width by pleated width to get the open-to-pleated ratio for that sample. Apply the ratio to the area with regular repeats. Add allowances, any sections that will stay flat and the length of the cut separately. Then place the open panel on the usable width of the cloth. The number of rows and the length each row occupies together determine how much cloth you need from the roll.
In this example, four repeats measure 48 cm open and 20 cm pleated. The ratio is 2.40. A finished repeat area of 50 cm therefore takes 120 cm of open cloth. Adding side seam allowances and the allowances at the top and bottom gives a rectangular cut piece of 123 × 64 cm. These figures illustrate a straight pleat panel. The dimensions for another panel will depend on its fabric, fold construction and finished size. A calculation made with the same reference points can travel from the sample bench to the cutting plan without mixing up the width seen on the garment and the width taken from the roll.
For a straight rectangular panel, think of width as the direction that crosses the fold lines. Length runs along the fold lines. In this example, the panel length follows the length of the roll and its open width must fit the usable cloth width. Another cut arrangement might put the folds in a different relation to the grain. Draw both directions on the sample sheet. Mark the direction of the folds and the grainline before discussing the layout, so the cutter and pleater read the same dimensions. Specify the intended face of the fabric if it looks different on the two sides.
Use the intended cloth and fold layout for the trial. A run of equal, one-way knife pleats makes a clear sample for this calculation. Choose a section away from edges that may carry a seam allowance or a partial fold. Decide where the future crests will run while the cloth is open. The two marks used for the open measurement must be identifiable again after pleating. An end mark can sit at a crest or at a particular layout line that will become that crest. Agree on that reference with the person making the sample. Give paired open and folded photographs the same sample number.
Support the pleated piece as it will be held at the measurement line in the garment. A sample lying at rest and one held open under tension will give different widths. Put the piece on a flat surface and ease the folds into the intended position. Measure straight across the section. The distance with the pleats in place runs across their projected width, so keep the measure clear of the channels between folds. If the top is temporarily held with stitches or clips, record where they are. Use the same support and restraint for the next sample if the point of the comparison is the repeat itself.
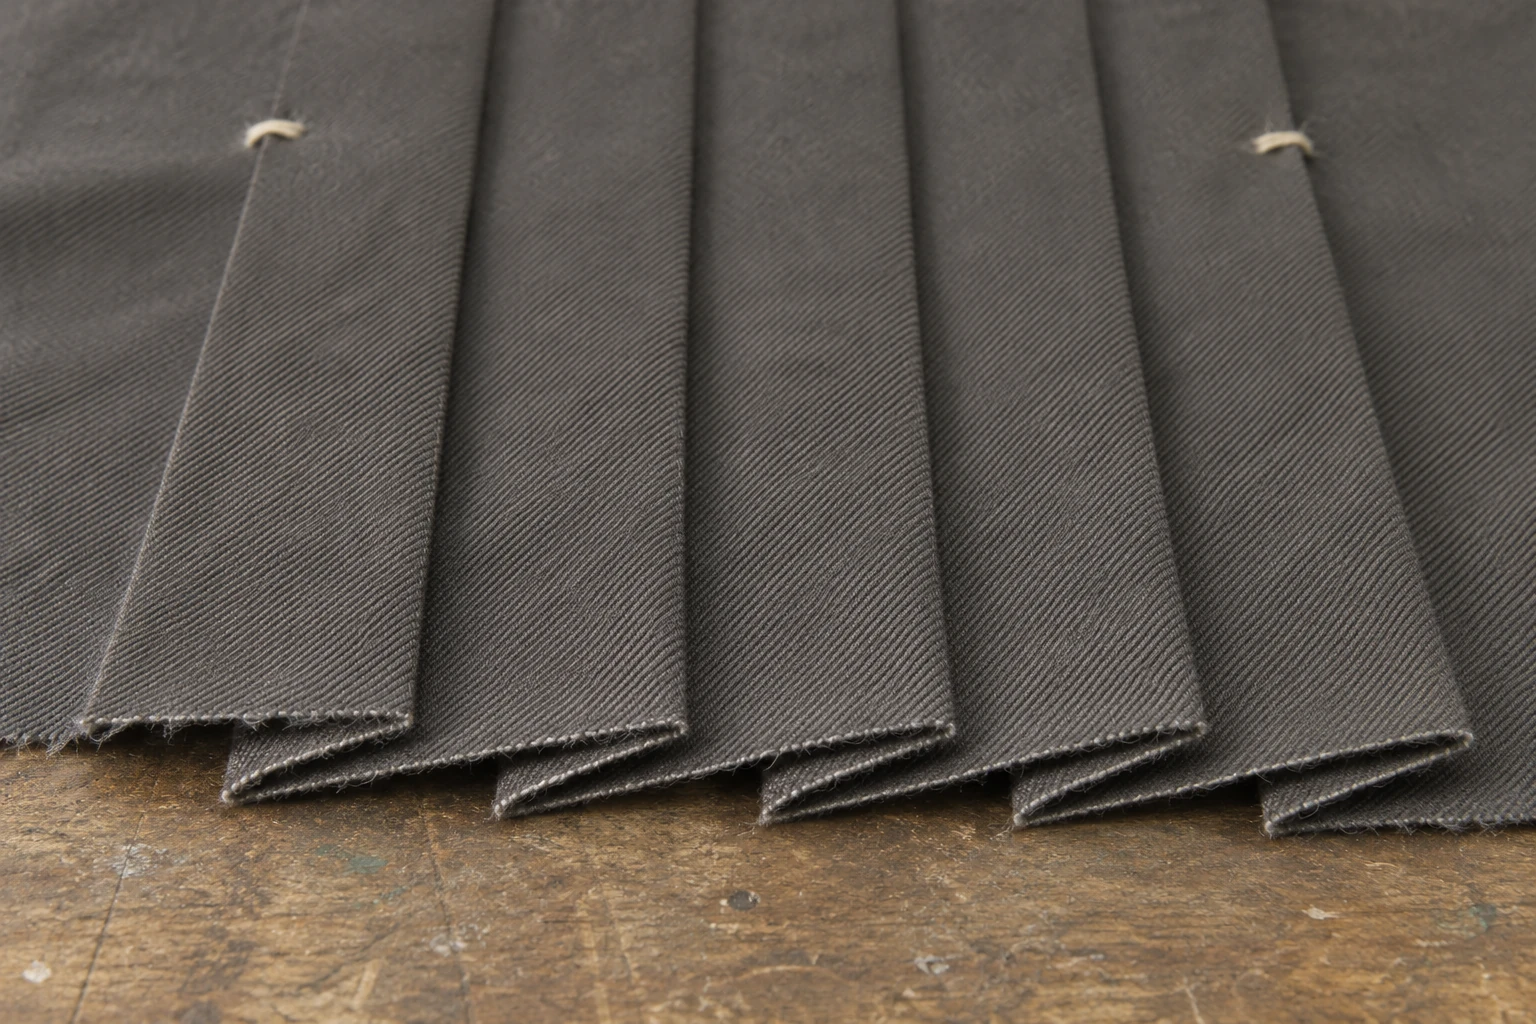
Measure a run of several complete repeats if the folds are narrow. Five consecutive crests define four intervals. Use equivalent reference points at both ends, such as the same edge of a crest at the first and last positions. If a mark sits under the fold after forming, make a note of which edge it corresponds to. Check a second line farther down the panel if the folds change spacing along their length. This straight repeat calculation is for a regular section. A radial sunray panel widens towards the hem and needs a layout based on its own pattern rather than a single width taken from one end.
Suppose the four complete repeats measure 48 cm before folding and 20 cm after pleating. Each repeat takes 48 ÷ 4 = 12 cm when open. The average pleated repeat measures 20 ÷ 4 = 5 cm. Dividing 48 by 20 gives an open-to-pleated ratio of 2.40. For this sample, each centimetre of finished repeat area uses 2.40 cm of open cloth before side allowances. Write the direction of the ratio beside the number. A worksheet that reports pleated width per unit of open cloth would describe the same sample with the reciprocal value.
If the cloth has no other change in width in this example, the 7 cm difference per repeat is the cloth taken up inside the fold. A process that also changes the size of the fabric affects the measured ratio, so identify the stages at which the two widths were taken. The 5 cm closed measure is the interval between matching reference points. It can include a flat space between folds if the pattern has one. Explain where the reference points are on the swatch. A visible front face measured by one team and a crest-to-crest repeat measured by another are different dimensions.
Repeat the measurement on a second piece made in the same cloth. If the widths differ, review the support, hold points and the stage at which each piece was checked. A hand-folded trial can help choose a layout, while samples made with the intended process give a firmer basis for cutting cloth. Ask how the pleater will deliver the panel and identify whether the finished width used in the calculation comes from the delivered state or the later state at the sewing line. If the lower edge hangs freely and opens farther than the upper seam, record both widths. Use the line that controls the required fit when calculating repeats for that seam.
A target of 50 cm at 5 cm per pleated repeat uses ten complete repeats. The open area for those repeats is 10 × 12 = 120 cm. Multiplying 50 by 2.40 gives the same answer. Check the number of repeats as well as the ratio. A 52 cm target with the same repeat would span 10.4 intervals. Decide on the pattern whether a partial fold is acceptable next to a seam or closure. You can also consider a plain edge section or a different repeat spacing. Confirm the updated spacing in the sample rather than assuming the first ratio still applies.
Set the first and last folds relative to the seam lines. If a section beside the closure stays flat and is intended to finish at 2 cm wide, allow for it separately. In an example where the strip stays the same width through processing, it needs its own 2 cm and no pleat take-up. If the process changes the strip width, measure that strip in the relevant states. When the target dimension covers the whole panel, first identify how much of it really belongs to the repeat area. A seam-to-seam width can include a flat margin that the regular pleats never reach.
In the main example, add 1.5 cm at each side to the 120 cm repeat area. The resulting cut width is 123 cm. There is no additional plain edge strip in this panel. For a finished length of 60 cm, add 1.5 cm at the top and 2.5 cm at the bottom to produce a cut length of 64 cm. This length assumes that the panel reaches the intended finished length with those allowances and the chosen process. If the sample length changes during processing, use the actual before-and-after result to check the cut length. Keep the 120 cm open repeat area and 123 cm cut width on separate lines.
Check the usable width at the cutting table once the selvedges and any unusable edges are identified. In the example, the available width is 140 cm. One 123 cm wide panel fits in the approved direction. Two would require 246 cm across before any additional clearance, so this layout allows one panel per row. Each row is 64 cm along the roll, with the fold direction and grain shown on the pattern. If a material can be rotated in a different style, make that a separate layout review. Take the fabric face, grain and fold direction into account before counting the positions that use less length.

If one garment uses two identical panels, the two rows therefore take 2 × 64 = 128 cm of roll length in this layout. This is a subtotal for those panels. A waistband, lining, cutting gaps, roll ends and fabric reserved for sampling each need to be considered in the production marker. The 17 cm of width left in each row can only be counted towards another piece if that piece fits in its permitted direction. If the pleater asks for additional handling margins, add them to the outline and check the fit again. Check that the pleater can handle the full open length and width as well as confirming that the piece fits the cloth.
Check the actual size range before using an initial layout in a purchase calculation. A wider size can require a different panel layout. If some sizes are shorter, group them only where the resulting pattern arrangement works at full scale. Include the cutting clearance if the workshop needs one. A drawn layout right at the width limit can fail when a different roll has less usable width. Placing the largest pattern on a representative piece of cloth shows whether the gap at the side is usable. Record the width range for the layout so the cutter knows when to review it.
When calculating a batch, count rows for the actual panel quantities and keep any partial row visible in the layout. A different size may require a separate pattern arrangement even if it has the same finished length. If the cutting room plans to group pieces from several sizes, check that grouping against the cloth width and the permitted direction of each piece. Add the length used by the resulting rows before including the separately agreed allowances.
Keep the fabric reference, fold direction, repeat count, open and pleated widths and the line where the measurements were made. Send the open 123 × 64 cm cut outline and the 140 cm usable width assumption with the example. Enter 128 cm in the estimate as the subtotal for the two pleated pieces. Keep trial cloth and any non-usable areas on separate lines. An approved marker and the actual usable roll width can then turn the sample calculation into a fabric requirement for the planned batch.
When the cloth or fold depth changes, measure the same open and folded intervals again. When the closure or seam allowance changes, update the edge section separately. When a new size crosses the layout limit, rebuild the cutting plan before multiplying the panel subtotal by the quantity. Keep the earlier sample measurements with the new figure. This makes it possible to trace a change in the order quantity back to the fold, the cut outline or the number of rows on the cloth.
phone: +90 212 576 5250
fax: +90 212 493 0336
email: info@unlutransfer.com
Yenidoğan Mah. Eser Sok. No: 6-8
Bayrampaşa, 34030,
Istanbul / Turkey
TR 9150171175
Bayrampaşa Tax Office