For quick contact: +90 532 288 2200


Use the same points before and after care. Check panel width, crease definition and opening at the free edge separately.
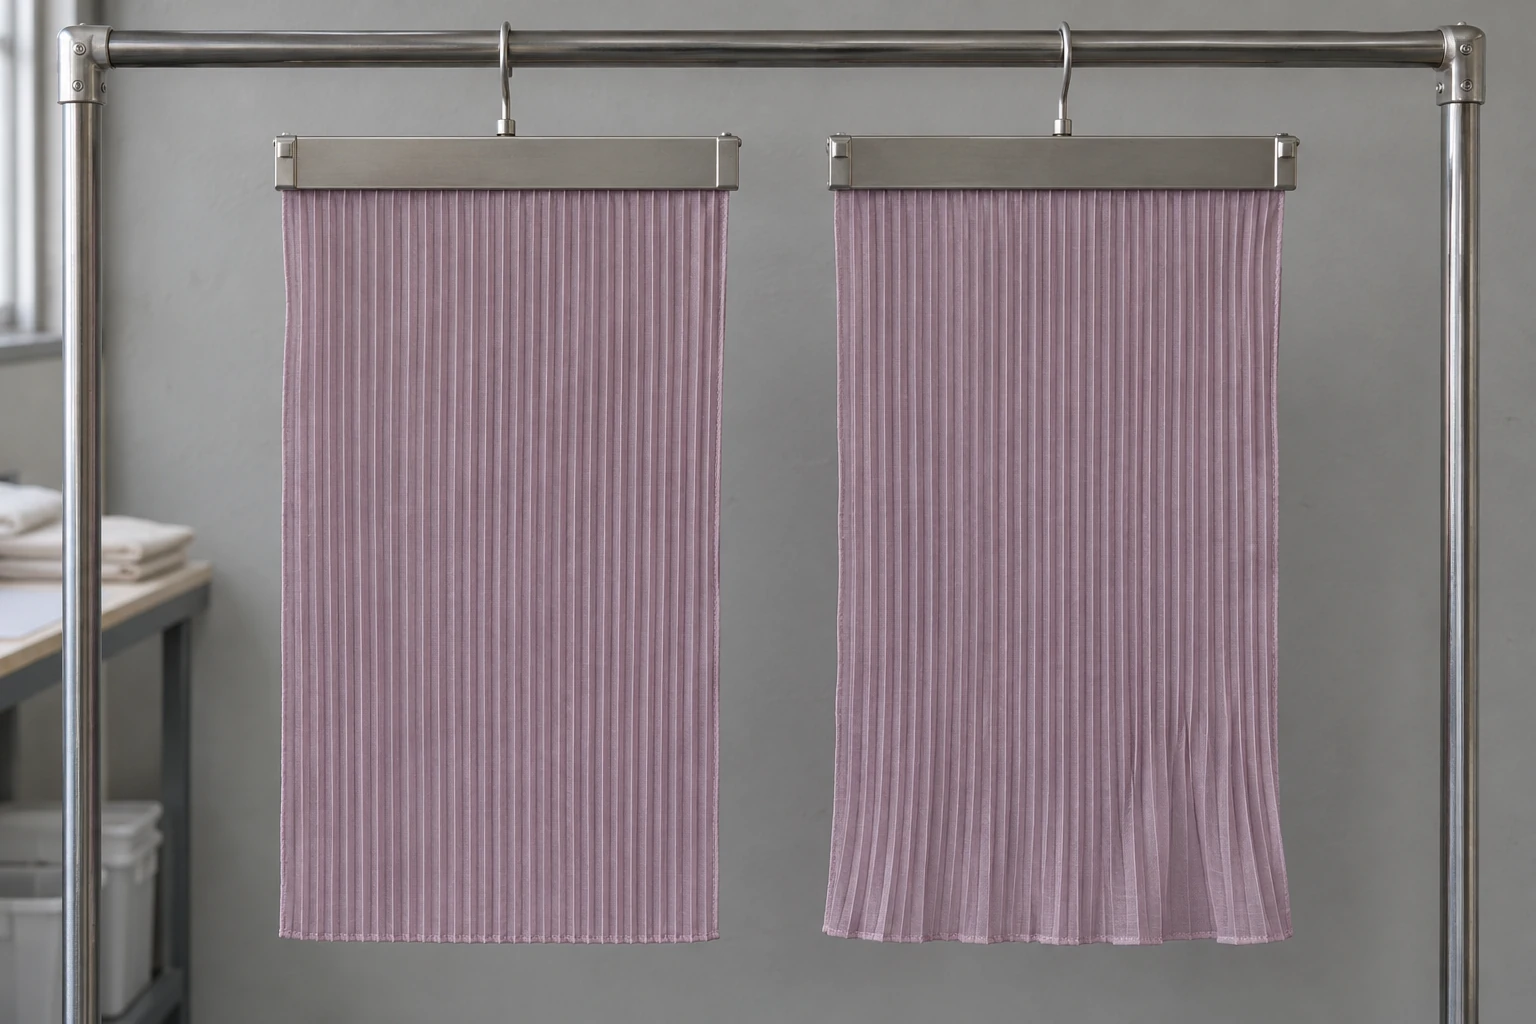
Measure the same panel before and after care using the same marks and support. Record three observations. First, measure the spacing across a selected group of folds and the width of the panel. Then photograph where the fold creases remain distinct and where they become less defined. Finally, look for folds that open more than expected near the free edge. A panel can keep nearly the same width while a few folds flatten at the hem. Visible creases can also remain clear while the distance between the marks changes. Keep those observations separate when deciding how the garment responded to washing or another care treatment.
Imagine a pale plum skirt panel with fine accordion pleats. A waistband seam holds the top while the bottom hangs free. At the first check, record the middle of the panel and the area near the hem under the support the garment will have in use. Folds well defined near the band can spread out at the bottom. If they open farther after care, a useful record shows where that change begins, how many folds are affected and whether the edge finish still hangs the same way. A single width for the whole panel would leave the sample room with no particular area to recheck.
Choose the wash, drying and any professional care steps for the proposed garment instructions. When comparing two care treatments, write down the step that changes. If you change the wash and the drying process together, the result is harder to trace to either one. Keep the fabric and pleat details, the care sequence, the cycle count and the planned checkpoints on the sample sheet. Use separate specimens for different treatment options. A temperature or drying instruction given for one finished pleated product is specific to that garment and its material.
Prepare samples close to the intended construction. You can measure a pleated swatch on its own. If the waistband, lining, stitching or hem contributes to the appearance, include those features in a sewn sample as well. A raw edge can hang differently from a narrow sewn hem. Record the edge finish before care and compare the same finish afterward. If you keep an untreated companion, start with comparable cloth, folds, grain direction and edge construction. It can help you revisit the original appearance under today's light when the treated sample is next to it. Keep the starting record for the treated piece too.
Decide which observation will inform approval. A dress may need clear folds at the hem, while another design may depend mostly on width where the panel meets the waistband. Set those priorities before seeing the result. A coupon helps you observe the folds and a sewn part shows what happens around seams and edges. Label them separately. If the project calls for a laboratory report, agree on the applicable method and result with the testing team. An in-house percentage records change at a selected line. A laboratory evaluation has its own test conditions and reporting criteria.
Choose an upper, middle and, when needed, lower measurement line. Tie each to a feature you can find again, such as a waistband seam or the finished hem. If the lower line lies just above the hem, record that position. Photograph which fold crests the two reference points belong to. A small thread tack on one layer may serve as a mark if it can withstand the planned care treatment. It should allow the fabric to move freely. A stitch through two neighbouring folds can hold them together and change the movement you are trying to observe.

Choose a run of neighbouring folds in a regular area. Nine consecutive crests define eight intervals. Use matching points at the two ends of the run and measure the same distance before and after. Fine intervals can be hard to read individually. If the same crests are still visible, divide the distance by the number of intervals to obtain a mean spacing. If a crest has softened and can no longer be identified, record that separately rather than quietly changing the count. If the original end marks are intact, you can still record the overall distance and show which fold became difficult to see.
Measure straight across the pleats without pressing the tape into the valleys. This gives the occupied width at the reference line. A measurement following the folded surface would give the path length along the cloth. If you also measure the finished width of the whole panel, record the distance between the left and right edges at the chosen height. Say whether each reading is taken near the top, through the middle or close to the hem. Width between marked crests and width across the whole piece can both be of interest, but their reference points must remain clear as the records pass between teams.
If the finished piece combines different cloths, make sure the record states which one carries the pleats. A lining can restrict the position of a seam while the outer fabric is otherwise free. Measure a point near that seam and a second point away from it when both matter to the decision. The same two locations should appear in the dry reference photographs.
After the care treatment, bring the samples to the same dry, settled condition specified for the comparison. If the initial reading was taken with the cloth hanging, use the same support, attachment line and settling time for the next reading. For a flat measurement, put the same face up and lay the piece without pulling it. A wider clamp or a move of the attachment points can change the apparent width. If you take both flat and hanging readings, keep them in separate rows. Compare the new hanging view with its original hanging view, and do the same for the flat views.
When ironing or another finishing step is part of the proposed care, record when it occurs. Pressing or rearranging the folds before a reading can change their appearance. Follow the sequence agreed for the trial. If the need to reshape the piece is itself important, record two views. Take the first after the wash and dry sequence and the second after the agreed reshaping. Label any readings with the corresponding stage. This makes it possible to see how the panel settled and how much of its later shape came from deliberate handling.
Take an overall photograph and a detail from the same directions used for the first record. Sidelight can make a fold crest easy to see, while a change in the light direction can make that same fold appear more or less defined. Record the sample and the side of the cloth in view. Keep clips, weights and the measuring tape away from the visible folds when taking the reference photograph. If two reviewers count different numbers of crests, inspect the actual panel together under the same light. A weak line in a photograph can still be traceable on the cloth itself.
Suppose the same marked distance is 200 mm before care and 210 mm afterward. The line is 10 mm wider. Relative to the starting value, the change is (210 − 200) ÷ 200 × 100, or +5%. The positive sign indicates that the span widened. It does not express how many creases were lost. If the same eight intervals are still identifiable, the mean goes from 25 mm to 26.25 mm. It is possible for a few folds to account for most of the extra width, even when the mean is the same as that of a panel with small changes throughout.
Describe the appearance of the creases as a separate finding. The crests can remain distinct near the top and become rounder near the hem. A single mean width can miss that local change. Say, for example, that the middle line is unchanged but a named group of folds near the bottom has opened. If a new wrinkle cuts across the folds, show its direction. Two samples with similar panel widths can look different because one retains a clear crest and the other shows a more gradual change of light and shadow. Name the area where you see the difference and photograph it under the same conditions.

At the edge, locate the folds that are free to open. A seam or lining may hold one part more firmly than another. Let the cloth settle on the same support and look at several folds near the edge. Record a small opening confined to the hem separately from a crease that becomes indistinct farther up the panel. Note where each begins and how many folds it affects. If a step at the hem changes when you level the clamp or move it back to the original marks, check the support again before attributing the difference to care.
When a panel looks wider near one edge, compare the left and right ends of the same line before calculating a whole-panel mean. A group of unchanged folds can hide a larger opening elsewhere. Keeping the observations by location makes it possible to return to the seam, hem finish or free section that needs attention.
If width changes but the creases remain visible, check the measurement points and how the piece was held. If needed, measure an unpleated companion of the same fabric for dimensional change. That comparison may help distinguish a change in the cloth from a change in how the folds lie, although the two readings do not combine into an exact explanation. If the detail photograph shows opening only at the edge, try a single change to the edge finish or the care step in a new sample. Changing several things together makes it harder to tell which alteration affected the result.
For a repeated care trial, record the starting reading and all scheduled checkpoints at the same marks. State if any reshaping is needed after each cycle. One sample may show a modest change at first and more opening later. Another may settle after the first cycle and then look similar through subsequent checks. Agree on the approval checkpoint before testing. Keep interim findings and compare the final result with the original baseline. If a reading is unexpected, repeat it with the same support and check where the tape crossed the marks. A repeat observation on another specimen can help determine where to focus the next sample.
Keep the cloth and pleat references, edge finish, care sequence, cycle count, readings and photographs together. Mark which lines and views inform approval. A note can state that width changed little at the middle line and that two folds opened more at the free hem. That sends the next reviewer to the right part of the sample. Connect the acceptance criteria to the actual garment and intended care. A new piece can then be checked at the same points before the change is attributed to the fabric, the pleat or the way the sample was held.
phone: +90 212 576 5250
fax: +90 212 493 0336
email: info@unlutransfer.com
Yenidoğan Mah. Eser Sok. No: 6-8
Bayrampaşa, 34030,
Istanbul / Turkey
TR 9150171175
Bayrampaşa Tax Office