For quick contact: +90 532 288 2200


Compare the main motif and the ground on the same cloth. Test relief height, texture spacing and the plain area around the motif separately.
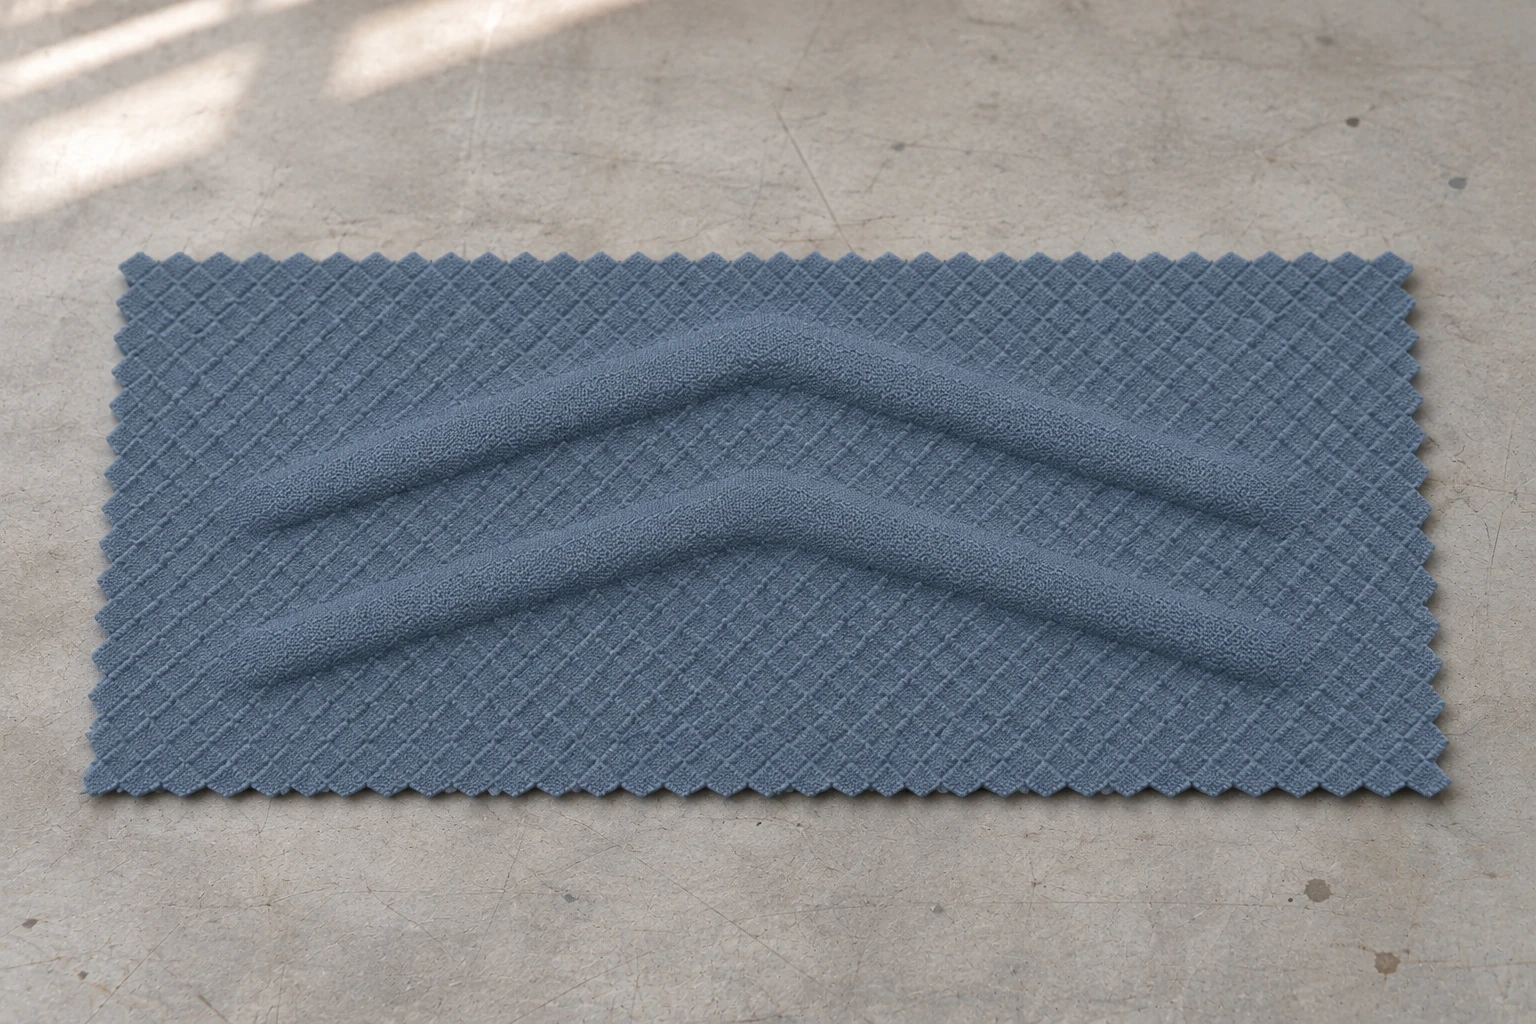
Start by deciding what a viewer should notice first. To give the main motif priority in a layered emboss design, test the height of the background relief, the spacing of its repeat and the distance between the background and the main motif. Change these separately. For the first comparison, keep the main contour the same and make the background shallower. For another trial, use the same background and leave some plain fabric next to the main contour. Compare samples on the same cloth with equal lighting and orientation from the product's usual viewing distance. Move closer to examine the edge of the main motif and to see whether the smaller texture is still identifiable. The two views help you choose an arrangement that works on the finished piece.
Picture two broad angled ridges on slate blue cloth with a field of small diamonds behind them. The angled lines are meant to catch the eye first. The diamonds add interest when the cloth is viewed more closely. Both features can be formed from the same coloured fabric. If the diamond ridges are strong or extend to the edge of the main contour, they may draw the eye first. Before asking for the main lines to be raised further, look at the height of the background, the distance between motifs and where the two kinds of relief come together.
Describe how the main design should read. If two broad lines are meant to be seen as a pair, include the gap between them in the description. It may be important to see the fabric between the lines as well as their outside contours. A regular diamond texture between the lines may help tie them to the surrounding fabric or break up the space the design needs. Specify which effect you want before the trial. Identify which part of the motif is most visible when the product is used and start the detailed inspection there.
In one product, the fine ground may add a little variation to an open area. In another, it may need to be recognisable when someone brings the fabric close. If the ground should also be visible at a distance, consider how much space it occupies and how its appearance compares with the main ridges. If it is a close detail, first view the sample from the usual product distance and then pick it up. Record the two observations separately. A texture that recedes at a distance can still have a defined role in the close view.
Decide how the ground meets the outside edge of the main motif. The small diamonds can stop right at the broad ridge. Another option is to keep a strip of plain fabric along the main line and start the diamonds beyond it. The preferred distance may vary between the inside of an angle and a straighter section. Several diamonds may be truncated near a bend. Mark the bend and a straight run on the drawing so you can check both on fabric.
When discussing layers with the supplier, specify that you mean different levels in the surface design. The term by itself does not specify added layers of material or a sequence of embossing passes. The material, tooling and geometry all affect how the relief can be made. Mark the areas for the ground, main motif and transition, then ask for a fabric sample of each on the intended face and in the intended direction.
Start with three pieces if possible. The first has only the broad lines, the second has only the small diamonds, and the third combines them. If the broad lines are easy to identify on their own and harder to see in the combined design, compare where the change is most noticeable. You may still read the straight part easily and see the biggest difference near a bend. Use a second trial to find out whether changing the background height, spacing or plain border helps.
Set the size and position of each piece before sampling. If you are comparing an area near the edge of a roll with one in the middle, record those positions. When the question is about the design, start with pieces cut in the same direction and, where possible, from comparable parts of the cloth. Put codes on the back where they will stay out of sight. Include a drawing that marks the first diamond, the two ends of the broad line and the top of the sample. Colour and texture can be close across pieces, so keep the code next to the drawing for the relevant option.
Check that the variation you requested was the only one made. If one sample has shallower diamonds and also a wider main line, record both changes. You can compare the overall result with the original. To assess the effect of shallower diamonds alone, ask for another sample that keeps the original line width. Keep the three starting samples for later rounds. An example of the ground by itself helps you see whether a change affects the whole field or mainly the area around the broad line.
Keep the main motif's dimensions, location and outline the same in the first comparison. On the same fabric and in the same colour, compare diamonds with the same spacing but different relief heights. See which lines draw attention first. If the same ridge is clear on a straight run and blends into the ground at a corner, mark that point. Make sure the comparison is shown on the same face and under equivalent light. If one piece appears much darker, check the viewing position, surface orientation and fabric before attributing the difference to the height.
For the next trial, keep the background relief as close as possible to the original height and vary the spacing. A tight repeat fits more short lines and shadows into the same area. A looser repeat exposes more plain fabric between them. The change in spacing can make the area beside the main ridge look different even at a similar height. If the diamond size or direction changes at the same time, record the difference. Show the intended spacing on the drawing so that the other dimensions can be kept comparable.
Use actual measurements if you need to approve a height. A crowded texture can look darker while each ridge has the same height as in the more open arrangement. When height is measured, identify the reference level and the points on the textured cloth. For a visual check, describe what you see. You might say the diamond edges are easier to distinguish under side light or that the whole ground reads darker. A photograph can show those differences without assigning dimensions to them.
Put the pieces in comparable positions. Moving one sample closer to a window can change the contrast of the ground. Switch the two pieces and check the difference again. If the apparent difference moves with the fabric, compare the surfaces at the marked point. If it stays on the side nearer the light, adjust the setup and repeat the view.
Keep the same ground and main motif, and vary the space between them. In one sample the diamonds can reach the broad line. In another, leave a narrow strip of untouched cloth. Add a wider version if you need a range. Compare both a straight section and a bend. Inspect the flat space between the foot of the broad contour and the nearest diamond. A shallow slope at the foot of the relief can extend into an area that looked blank on the drawing.

A gap that looks adequate along a straight run can feel crowded inside an angle. The tips of several diamonds may appear to meet there. You can test moving those diamonds farther away or omitting a few at the bend. Mark the changes on the drawing. Also look at the ends of the broad line. An uneven run of partial diamonds can look like another extension of the motif. Check that the broader gap looks deliberate and leaves room for the smaller texture on the product.
Consider how much of the ground survives after cutting and assembly. Use a paper window the size of the exposed panel if the motif sits near a finished edge. A plain margin that looks comfortable on a full swatch can leave almost none of the patterned ground within a narrow panel. Inspect the reverse when you need to check orientation or which side goes out. The finished reading still needs to be checked from the visible face, including the support planned for the assembled product.
Arrange the coded samples as they will be seen in use. Ask what viewers pick out first and what they notice next. Let them look before describing the levels of relief. If someone sees two independent ridges where the intention is one motif, look at the fabric between them. If someone sees the diamonds first, record the angle and distance. Compare that initial reading with what the person notices closer to the cloth.

In the close view, follow the edge of the wide ridge, the space between the two broad lines and the closest diamond. This identifies where the two parts of the design become difficult to tell apart. A comparison with a stronger, busier ground on one piece can help the team select an overall look. If it also changes the spacing or the plain area, use further samples to identify which change did the most. Hold the other features as steady as the process allows.
Keep the first lighting condition the same. Then look again from a second direction typical of the product. Low side light can bring out both the broad main line and the fine background. With diffuse light, a particular edge may look softer. If the fabric wraps around a curved part, check it flat and then on the planned support. Record the light, viewing distance and shape of the mounted fabric. For a catalogue view, photograph the two samples together and also check the result at the size customers will see. The closest view can show diamonds that disappear when the image is reduced.
Keep the approved sample with the fabric reference, colour, face, direction, drawing version and date. Say from which angle the main motif is clear and at what distance the ground becomes visible. If a plain strip was left, locate it on the drawing and in a detail photo. Link the wider product view to the same sample. If the pattern moves to a panel with a different curvature or a new colour, use the approved sample as the starting point and check the fabric again in that position.
When requesting a correction, identify the area and the specific feature that should change. Ask for shallower diamonds at the current spacing or a plain area at one bend while the dimensions of the broad lines stay the same. Keep photographs of the same checkpoint from the different trials. When the next sample arrives, start from the recorded viewing distance and inspect the same edge and ground. Send the approved swatch with the corresponding artwork so the people preparing the next fabric trial can see how the main motif and the background are meant to read together.
phone: +90 212 576 5250
fax: +90 212 493 0336
email: info@unlutransfer.com
Yenidoğan Mah. Eser Sok. No: 6-8
Bayrampaşa, 34030,
Istanbul / Turkey
TR 9150171175
Bayrampaşa Tax Office