For quick contact: +90 532 288 2200


Define the gloss area separately from the underlying print. Check the edge, the matte gap and alignment across several repeats on the same cloth.
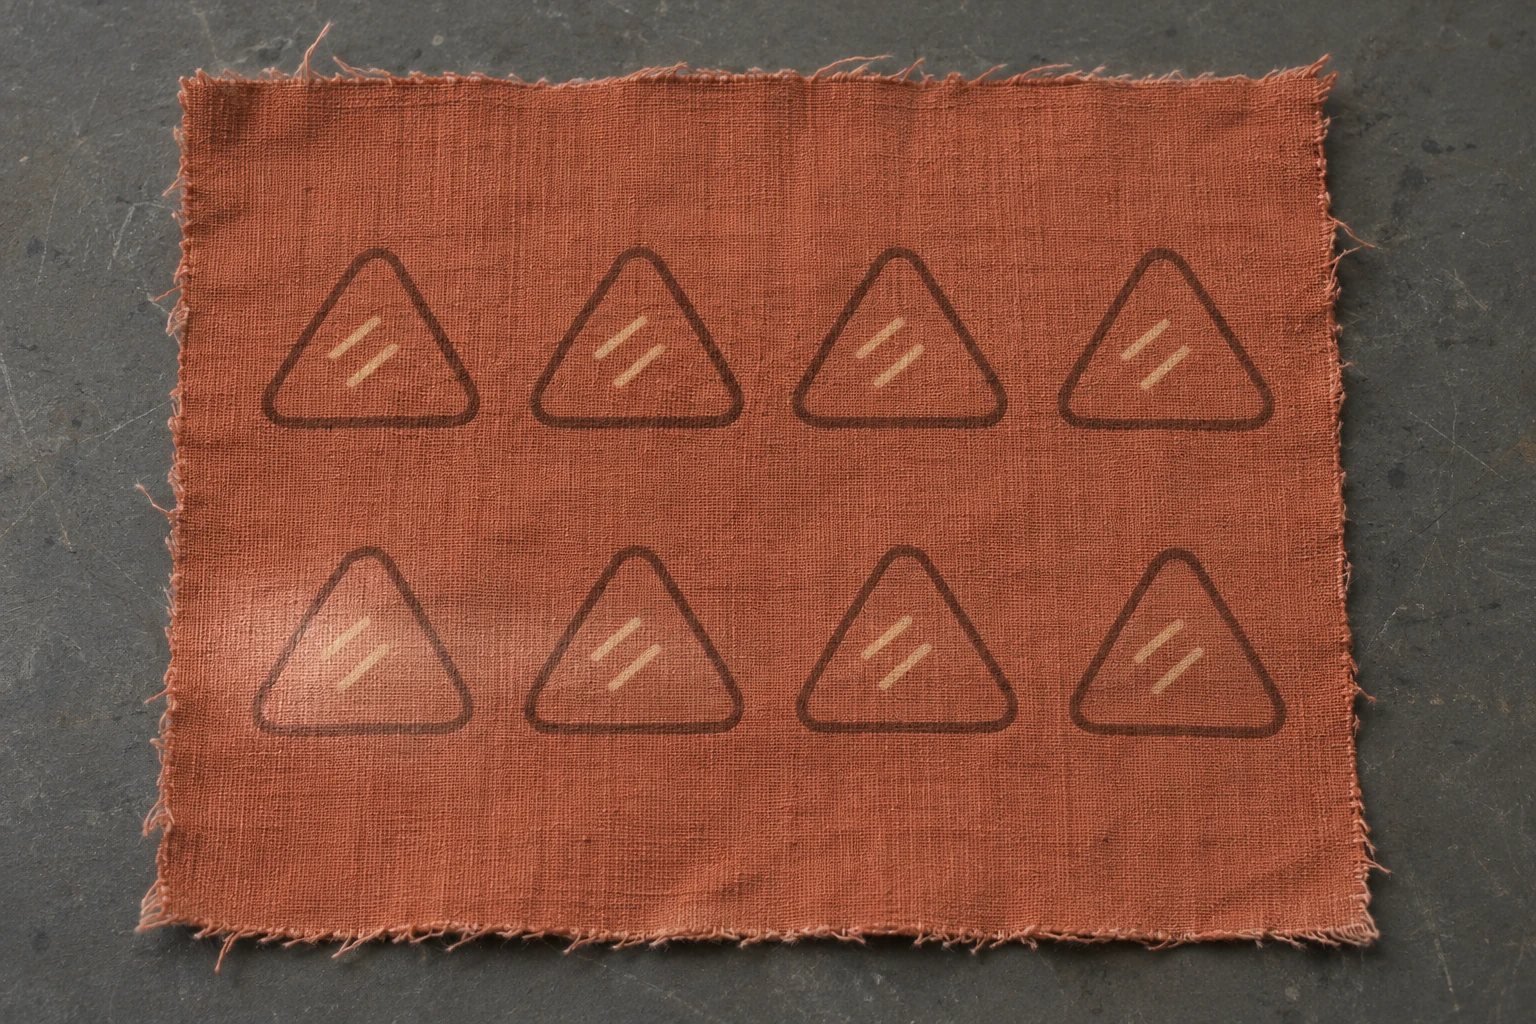
To keep the boundary of a spot-gloss motif clear, draw the area that should shine separately from the underlying print. Specify whether the clear finish should meet the printed outline or leave a narrow matte gap. Ask for a sample at the intended scale, with the same starting point and repeat as the base print. Inspect the corners, straight edges and matte spaces between motifs. Look at the print under soft light first. Then tilt the piece to make the gloss boundary visible and check it across several repeats. A similar offset at every motif calls for a check of the relative position of the artwork. A difference that grows across the cloth points to a closer review of repeat spacing, scale or fabric layout.
Imagine a matte terracotta fabric printed with rows of dark brown triangles, each containing two short pale strokes. The inside of the triangles in a selected row receives a clear glossy finish. The strokes should still be visible and the fabric outside the triangles should stay matte. If a bright area extends beyond a corner, check it from a second angle. The bright part of a reflection can shift with the light. Use a matte triangle beside it and the underlying outline as references for the position of the finish.
Start with the artwork that shows the size, direction and position of the underlying print. Make a separate file or layer at the same scale for the area that will receive clear gloss. Use the same reference edge and repeat origin in both. Fill the gloss area in the drawing if that makes the extent easier to see. Tell the supplier that the fill represents the application area and that the finished design should remain visible through it. Open both drawings in the same orientation and identify the areas to be left free of gloss.
Draw the relationship between the dark outline and the gloss along a straight edge and at a corner. You may want the gloss to reach the inner edge of the dark outline. Another version could leave a narrow matte gap. Compare the options on the intended cloth before choosing one. Weave and light can make a small gap appear different from its outline on the screen. State which version the supplier should sample. Include the pale strokes in the composite view and state whether both should sit beneath the finish. A translucent layer can still change the appearance of the colour below it, so use the planned shade and cloth for approval.
Mark which motifs receive the effect. If the accent moves to a different row after each repeat, send enough of the artwork to show the sequence. A close view of a single triangle cannot establish which rows should be kept matte. Include a wider view showing the first motif and the direction in which the repeat runs. If a finished edge cuts across the glossy row, indicate which part of the design remains visible inside the product panel.
Send an overlay view and a view of the application area by itself. The overlay shows how the dark and pale lines relate to the gloss. The individual view makes the edges and empty spaces clear. Make sure the widths used to describe any gap belong to the actual artwork size. A zoomed screenshot may show a comfortable separation that becomes hard to see on the fabric.
Retain a piece with the underlying print alone if possible. Ask for the other trials on the same fabric and base design. In one trial the gloss can follow the inside edge of the triangle closely. In another it can leave a narrow matte border. Keep the other features as consistent as the process allows. A change to the colour, scale or cloth makes the result harder to attribute to the gap. Ask for the fabric direction, the visible face and the finishing sequence to be recorded.
Look for a sample large enough to show several repeats. One small piece can tell you how a single corner looks. A longer sample lets you check the same corner near the start and end of the area that will be used. Note where each swatch came from across the width. Keep the cloth relaxed on the table. If it was held differently during two stages of production, that may affect apparent alignment. Ask the workshop how the sample was prepared if you notice a difference.
Have the supplier identify what changed in each trial. If only the gloss artwork was made narrower, check that the dark triangle size stayed the same. Another trial may change only the starting position of the two layers. Compare these separately. Confirm a known distance in the artwork at actual scale and keep enlarged images for the detail check. If you receive an intermediate sample, assess the final appearance again after the planned finishing steps.
For a single-motif trial, examine the top point, both lower corners and the pale strokes. For a longer trial, include the matte row as well as the glossy one. A boundary that looks clean on one triangle can still move relative to the printed outline farther along the repeat. Keep both sheets if the checks will be done by different people. Record the sample code, the corner you looked at and how the gloss appears next to the untouched print.
Look at the cloth under soft light first. Can you distinguish the dark outline, the pale strokes and the fabric between them? Then tilt the piece until you can see one straight edge of the gloss. Follow that edge to a corner. If a small bright area seems to leave the outline, change your viewpoint and see whether the boundary is still in the same place. The brightest band of the reflection can move along the surface as you tilt it.

Where the artwork calls for a narrow matte gap, look for a small glossy trail inside it. Follow the dark contour as it leaves the glossy area. Compare a straight run and a rounded corner, since they can look different. On the corner, see whether the clear edge follows the same curve. Where the planned gap is narrowest, check from an angled view that you can still distinguish it from the outline. Repeat the check on the same feature of the neighbouring motif.
Include two reference points in a close view, such as the top of the dark triangle and one end of an inner stroke. If the dark outline looks uneven along the yarns, compare it with the piece that has only the underlying print. Repeat the observation if an irregular edge appears only under a strong reflection. Photograph the print and the glossy edge under the conditions that show each one. Keep a wider view to record how visible the effect will be at the normal product distance. An enlarged view is most useful for locating a precise issue.
A bright highlight may briefly obscure one of the pale strokes. Soften the light or change the angle to check whether the stroke is still clear on the physical cloth. Check what happens in the lighting the finished product will actually receive. If the normal view shows the underlying design and an angled view explains the glossy surface, keep both views under the same sample identifier.
If clear gloss extends beyond one edge and stops short of the outline on the opposite side, the whole glossy area may have shifted in one direction. Check two opposite points. For example, the matte gap may widen at the left edge while gloss appears beyond a lower corner on the right. Check the artwork origin, the physical size and orientation of the cloth, and the registration points for both layers. Record the appearance of the edges even if the production cause is still being investigated.

Compare the same edge of several repeated motifs. If the difference has the same direction and size near the start and end, look at the relative starting position. If it grows farther along, compare the scale and repeat spacing of the files with the dimensions on the fabric. Look at adjacent triangles if you find the issue on a single corner. Each comparison tells you where to look next. Use the drawing and information about the textile trial to confirm the cause.
Gloss outside two opposite edges can suggest a footprint that is larger than expected. Compare the centre of the clear area with the centre of the print, and observe whether the excess is even or local. A jagged border can appear near one corner while the planned matte strip remains intact elsewhere. If the alignment looks right in the drawing, compare the printed and gloss edges on the physical piece with the workshop. Mark the area in question instead of asking for a general shift across the layout.
Include the neighbouring matte row in the inspection. Where a matte space is narrow between glossy parts, check it under another light direction. A small issue on an isolated motif can look different when it occurs throughout a row. If the cut edge is close to the design, mask off the hidden parts with paper and look at the visible area. Repeat the review on a supported panel if assembly changes the angle of the fabric. Note which part of the trial was checked in the finished orientation.
Keep the two artwork files with the swatch code. Record the fabric direction, face, repeat and intended matte gap. Mark the first and last corners that were checked and show the position of each in the landscape view of the sample. Retain a view from the usual product position and an angled view of the gloss boundary. If a change is required, specify which edge should move and which part of the underlying print stays in place. A marked copy can show the exact area while the original image retains the overall appearance.
Save a view that contains enough of the repeat to show how the glossy and matte motifs read together. A small trial can show a clean corner without showing the space between rows. If a revised sample arrives, compare it with the first one on the same face and under comparable light. Record the version of the two drawings that corresponds to the approved sample.
For product photography, choose an angle that fits the information the image should show. A strong reflection may reveal the gloss and obscure a pale line. The fabric approval can then refer to a physical view where both details are easy to check. If the base colour, cloth or underlying print changes, check the clear area on the new fabric. Describe where the gloss should stop and how much matte fabric should remain visible next to the selected motif.
phone: +90 212 576 5250
fax: +90 212 493 0336
email: info@unlutransfer.com
Yenidoğan Mah. Eser Sok. No: 6-8
Bayrampaşa, 34030,
Istanbul / Turkey
TR 9150171175
Bayrampaşa Tax Office