For quick contact: +90 532 288 2200


Document the wrapping and roll before opening. Compare creases, pressure marks and changes in relief on the same area at opening and after resting.
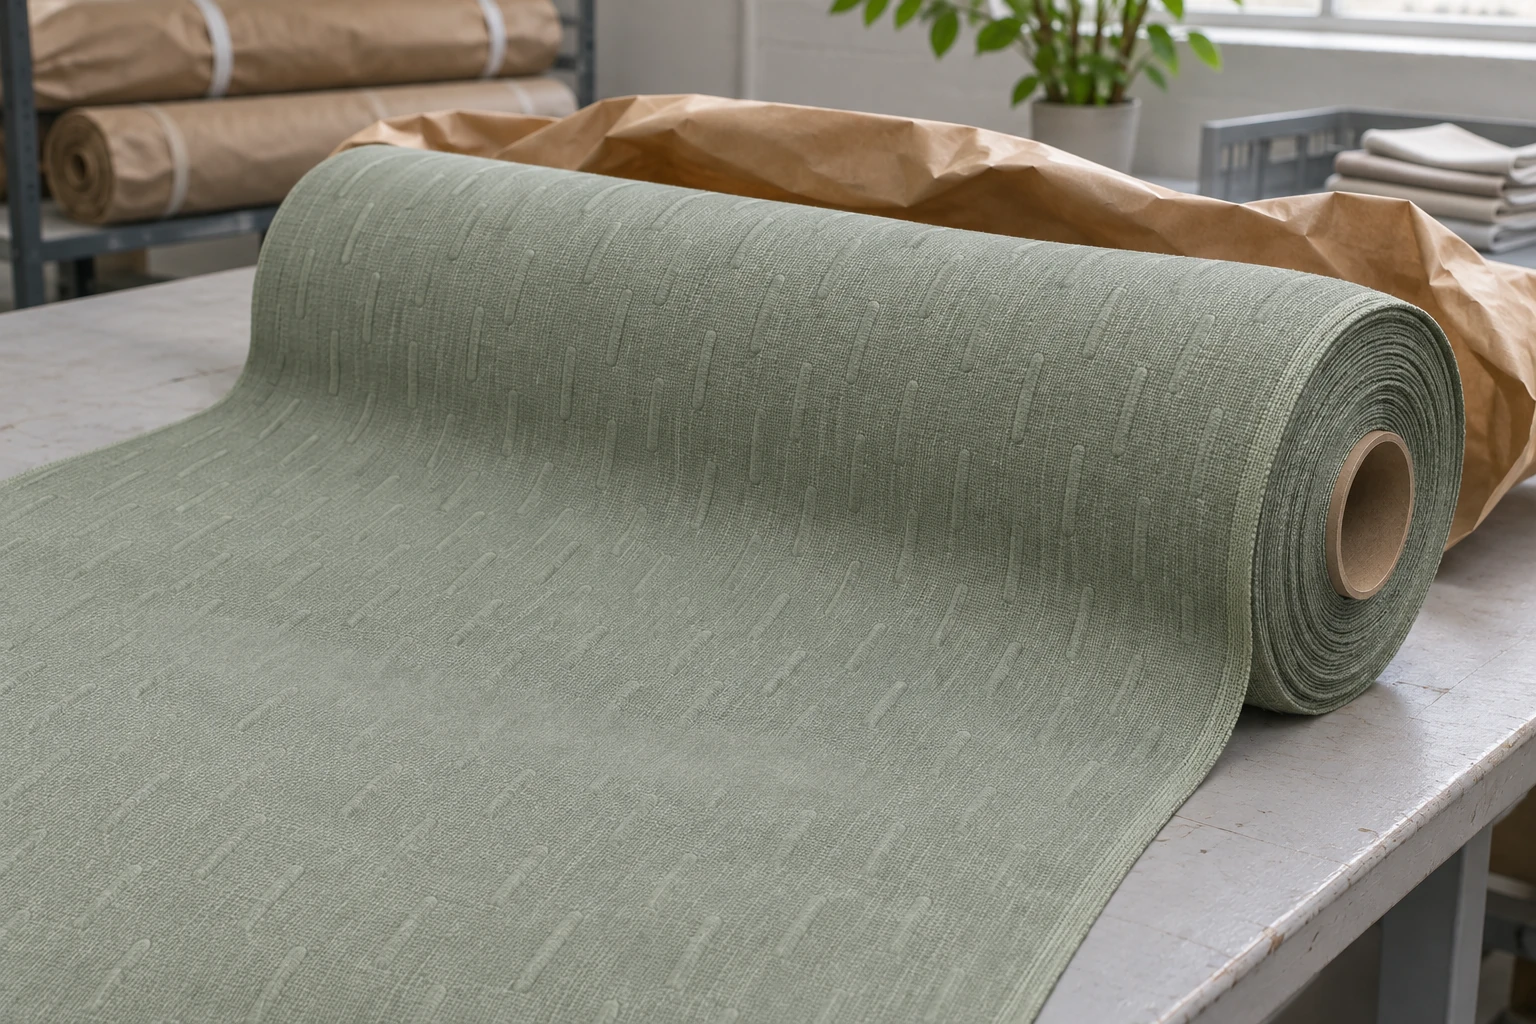
When you open a roll of embossed fabric, look for creases, bands where the cloth may have been pressed, wavy edges, changes in sheen and areas where the relief looks shallower. Check the outer wraps, an accessible section farther in and a reference sample if available. Use the same face direction and lighting, and photograph the first view. Then let the cloth rest without tension or weight and check the same place again. Record which features remain, which look different and what the fabric was in contact with. If a mark seems to line up with a fold in the wrapping or a support, keep that position in the record for review.
Imagine a sage green upholstery cloth embossed with small raised dashes. On the first wrap, some of the dashes look shallower across a narrow band. Farther into the roll, the pattern looks more even. If the band sits near a fold in the wrapping, a photograph taken on receipt may help locate the contact. Mark the position of the band, then use the same set of dashes in the second observation. Compare them with matching motifs in the section farther in. If a sample from the same lot was set aside before wrapping, place it in the same light. Each comparison gives the team a different point of reference.
Record the roll identifier, the lot and the packing and delivery dates if available. Photograph both ends, the outer wrapping and where the roll rests. Include folds in the protective material, the position of tape or ties, any crushed corners and the part touching the support. Note whether the roll was lying on its side, touching other rolls or bearing on the fabric itself. Use what you can see or verify from records. If you only have the condition at delivery, note that as a single observation. Duration and conditions during transport may still need to be checked.
As you remove the wrapping, note which face of the fabric was outward and where the loose end emerged. Look at the core and the roll ends. The layers can line up evenly or shift outwards at one end. An uneven end gives you a place to check for edge changes once the cloth is open. Record any earlier opening or rewinding. Add the date and direction to the views so that an image made after rewinding can be distinguished from the first opening. If there are multiple rolls in a delivery, record the condition of the wrapping separately for each affected roll.
Use a common feature to connect the packing photos to the cloth. A tie close to one end of the roll may correspond to a small area along one side of the first wrap. Photograph it in relation to the seam or fold of the packaging and to the end of the roll. Note the position on the opened fabric along and across its width. If the roll was turned between views, record the change. If the cloth was rewound, a layer originally outside may later be inside. Record which stage the words “outer wrap” refer to. Leave any uncertain relationship between the wrapping and the fabric in the record as a question.
If the carton is torn or damp at one corner, compare that location with the exposed fabric as you open it. Note where the goods lie relative to the damaged corner before you move the roll. If you cannot see the fabric beneath it, record the condition of the packaging and the fact that the cloth in that location has yet to be examined.
Unroll the cloth face up on a clean inspection bench without tension, with the pattern pointing in a consistent direction. Choose an origin for the length measurement. At the left, centre and right, compare a group of motifs from the outer wrap with matching motifs farther into the roll. If a section near the core is already accessible, record it separately. Note which layers could not be examined. A partial motif at a cut edge can look unlike a full one in the middle, so compare the same detail of several complete repeats in each area.
If you see a band across the cloth, look at the less defined relief and the boundaries of the band. A narrow, sharp line may remain where a fold has opened. A wider area can contain several rows of motifs that all look shallower. Some marks show as a bright or dark area only at a particular angle. Describe these individually. If there is visible soiling, colour transfer or dampness, photograph the area separately and note its extent. Check the handling and quality instructions before wiping the surface or applying moisture. Save an overview and a close view with an unaffected motif to help another person identify the difference.

If an edge ripples, let it lie naturally on the support and look at the motifs next to it. Note whether the wave stays close to the edge or enters the usable width. Pressing the edge down by hand can change the appearance during inspection. Show where the ripple becomes visible without pulling the fabric flat. If it is above a joint in the bench or a mat edge, slide the cloth onto a clear area without rotating it. See whether the apparent line moves with it. Mark the relevant width references and save an overview that includes both the affected area and the nearest usable edge.
Choose a similar motif that appears unaffected elsewhere on the same roll. If an approved sample was taken before packing, check its identifier and stage before comparing it. A coupon from another lot or cut in the opposite direction may have a different appearance to begin with. An inner section of the same roll helps you compare positions, but its earlier condition may not be known. In the record, distinguish the reference that was set aside before wrapping from the one selected during the inspection. If a band reaches only part of the width, note where its first and last affected motifs sit in relation to the reference edge.
Record the length and width positions at opening. Use a recoverable landmark, such as the edge, a particular row of motifs or the identifier on a cut piece. Leave the area on a clean suitable support, flat and without load. Follow the time interval agreed for the material and the inspection. The opening time and the recheck time belong with the pictures, along with how the cloth was left between them. If it had to be moved, note whether it was folded or rewound. Different storage or handling between checks can change what you are comparing.
Keep the lighting, viewing angle and direction of the cloth similar. If three dashes at the centre of the band looked shallower in side light on the first view, find the same three dashes on the second. The line may look fainter while part of the relief still looks less defined. The outline may look similar while a difference in sheen becomes harder to see. Describe each change, for example “the row is now about as clear as the neighbouring row under side light, but a narrow sheen difference is still visible from above.” If the camera changed its exposure, confirm the difference directly on the cloth before attributing it to resting.

For a side-by-side check with two pieces, align them and put both in the same light. If one is closer to the window, swap the positions without turning the pieces. Look at the same feature of each. For a comparison over time, return to the same place on the same cloth. Identify which view shows the reference piece and which views were made at different times of the same area. If the end use involves a curved or tensioned panel, complete the comparison with the cloth relaxed first. Then make a view in the intended position and record which support and viewing distance were used. A mark can catch the light differently in the two positions.
A band limited to the outer wraps is worth comparing with the wrapping and with any contact during transport. A line only near one selvage may be in the same location as uneven winding or a support at the end. For a line farther in, check the layer positions, any joints and the production records. A mark that appears in every exposed layer has a different distribution from one limited to a single point on the outer wrap. Note which pattern you found and which parts of the roll were accessible.
As the roll opens, its outside diameter decreases. If similar marks appear on successive wraps and their spacing changes, record which layers contain them. If the spacing along the cloth remains close to constant, compare it separately with the intended design repeat and ask the production team whether a rotating contact could be involved. Spacing and appearance can help focus the review. Combine them with the directions recorded at opening and with any history of rewinding. Compare with another roll only if you can identify the lot, fabric face and handling conditions of the two. If one roll was stored differently, record the difference instead of assuming both had the same exposure.
If two rolls from the same lot show different marks, leave their records separate. One may have a faint band across the outer layer and the other a small change in sheen near an end. Check the accessible equivalent locations in both. If a new packaging arrangement is agreed for the next delivery, retain these views and repeat the observations at the same stage.
Record the first and last points at which the mark remains visible, its width position and any usable area you have examined. Indicate how much remains uninspected. Review the appearance on the face of the intended part, at the normal viewing distance. A narrow band beside a selvage may be outside the cutting layout for a small panel, while the same band can sit on a visible part of a wide seat. Keep the origin and edge reference with the layout. If a swatch is removed, mark its direction and original position so the area left on the roll can still be traced.
Send the quality or production team the packing views, the opening view, the close detail and the later view of the same position. Include the observation time, light and resting conditions. If the material is to be rewound or otherwise handled before the next inspection, check its handling requirements and document its current appearance. Specify where the decision applies and which areas need to be reviewed again. Describe a mark as persistent over the conditions and time actually observed. The record should let the next person return to that position and check which parts of the roll can be used for the intended product.
phone: +90 212 576 5250
fax: +90 212 493 0336
email: info@unlutransfer.com
Yenidoğan Mah. Eser Sok. No: 6-8
Bayrampaşa, 34030,
Istanbul / Turkey
TR 9150171175
Bayrampaşa Tax Office