For quick contact: +90 532 288 2200


Compare unprinted, solid and segmented samples on the same fabric to see how the glitter motif behaves where the finished piece folds.
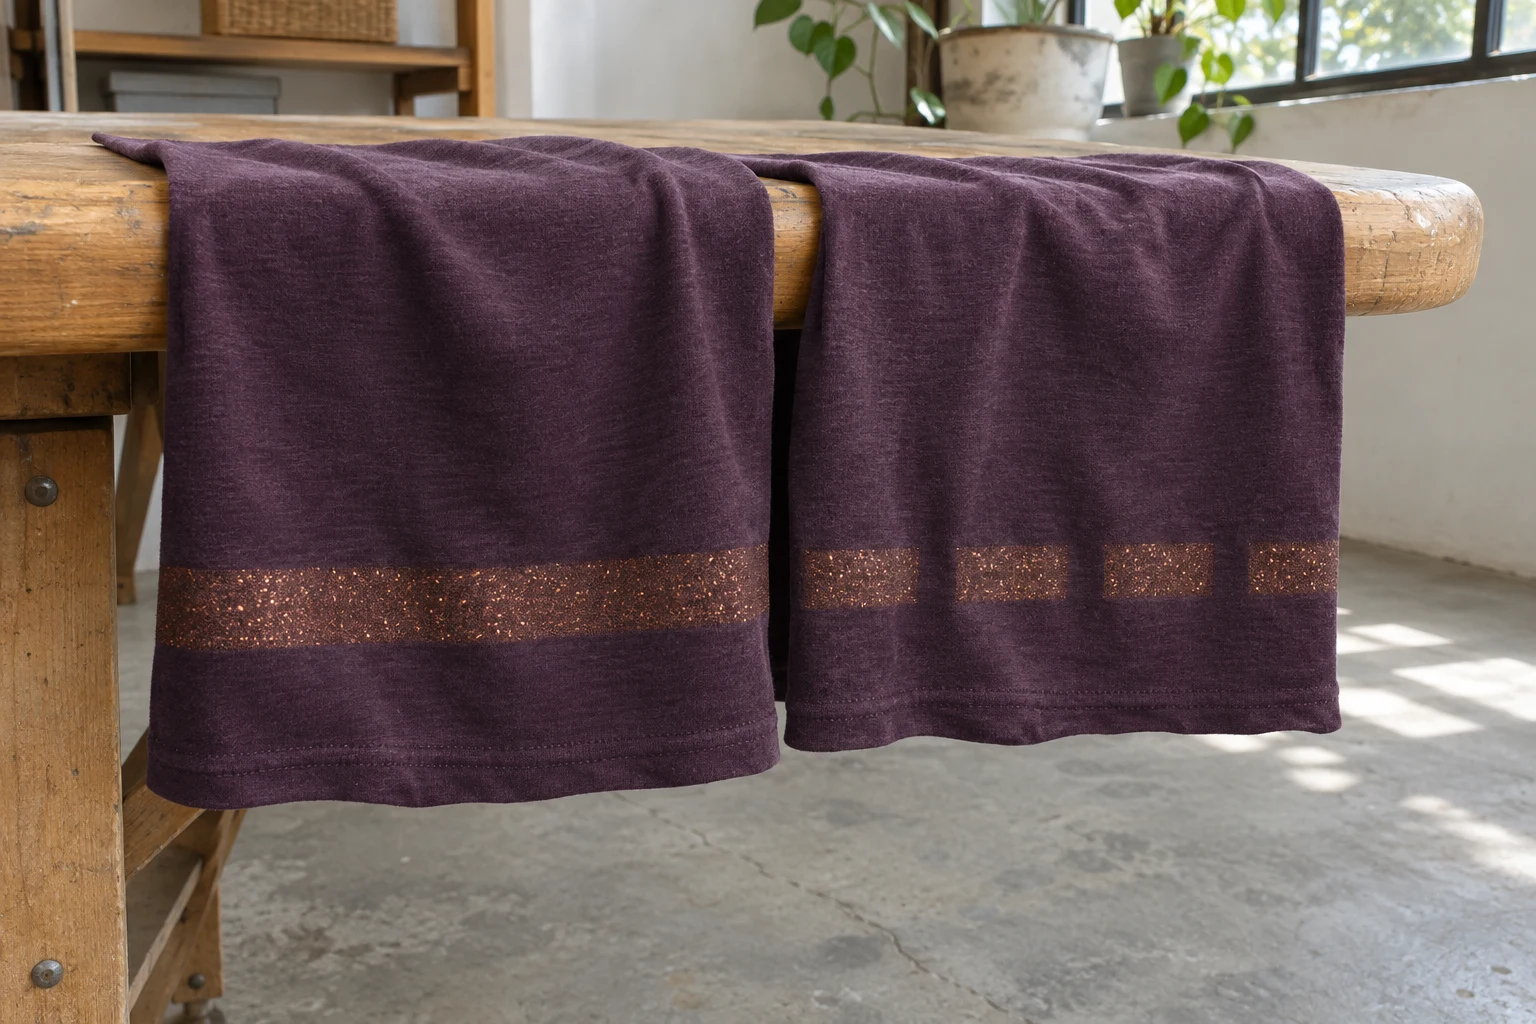
A broad area of glitter print can change how a fabric bends, depending on the print deposit, the base and the fabric. For a useful comparison, make three equal samples from the same cloth. Leave one unprinted, print a solid band on the second and divide the third into sections with bare fabric between them. Hang the samples in the same direction and compare the hemline, the folds and the way the printed area moves. Then check the motif in the place it will sit on the finished piece. Two layouts can use a similar amount of glitter and behave differently if one crosses a fold and the other leaves plain cloth at that point.
Consider a broad copper glitter band near the hem of a plum jersey top. The solid band may give the desired effect on a flat table. Once the top is hanging or bending around the body, the band could cross a place where the jersey would otherwise form a fold. A row of smaller printed blocks gives the fabric room to move between them. Whether that helps depends on where the gaps fall. The split in the design also matters visually if the band is meant to look continuous from the normal viewing distance. The sample needs to show both effects in the same placement.
Hand is what you feel when you touch or handle a fabric. Drape is how the cloth hangs and folds under its own weight. The observations are related, but each has its own useful sample check. Glitter particles can give a slightly granular surface while the cloth beneath still bends easily. A smooth continuous layer can offer more resistance when a particular cloth is bent. Hang the samples freely before folding or handling them. Then bend the printed area and the unprinted area gently in comparable positions. Write down where the fold forms and what you feel at the surface. Both details can matter to the finished garment.
Glitter content is one part of the printed layer. The base containing the particles, the deposit, the fabric construction and any underprint can all influence the result. Keep the print system and the cloth the same when comparing two layouts. Use fabric of the same direction and size, preferably from the same roll. If the base or underprint changes along with the design, record the difference. The resulting samples can still answer which combination suits the product, while a trial with a shared system is easier to interpret when placement is the main question. Save the original reference so the next proof can be set up in the same way.
The unprinted control shows the way the cloth already curls, falls or bends before the glitter motif is added. A jersey edge may roll even on the plain sample. If the process can separately affect the fabric, discuss whether to include an unprinted piece that went through the relevant handling or heat cycle as part of the trial. Keep it distinct from a cutting straight from the roll. Let all the samples rest under comparable conditions before observing them. A piece stored in a tight roll can hold a temporary crease that could otherwise be mistaken for an effect of the print layout.
Cut the pieces to the same dimensions. Place the solid band at the height planned for the actual product. On the third piece, print separate blocks in the same region and leave visible channels of unprinted cloth. If the question is specifically about layout, aim for a similar total printed area when the design allows. Record changes in the width, length or position of the band made to obtain that match. Similar printed area describes geometry. The thickness of the deposit and the weight it adds can still differ. Capture both layouts at full size or save a copy of the artwork with the samples.
If equal area is impractical, compare the two designs as candidates for the product. Document the dimensions of the band, the blocks and the gaps. The practical question is whether the proposed version leaves enough room for the fabric to curve in the place that needs to move. Mark the expected fold line on the paper layout. A gap in the wrong position can stay almost flat while a nearby printed block still crosses the fold. Trying the same gap at two different positions can be more informative than changing every space in the pattern. Keep the original layout to compare with the next proof.

A horizontal printed band can cross several vertical folds when a garment hangs. The position of each segment matters more than whether a flat drawing appears to contain open space. One gap may fall at the crest of a fold and another may be hidden inside it. Look at the length of the band along the hem as well as the single point that bends first. If the print moves to a side panel or a piece cut on a different orientation, prepare the sample in that orientation. A matching print sometimes appears differently once the knit direction and the shape of the piece change.
Keep the cut edges and attachment points comparable. A longer piece has more fabric below the clip and can hang differently. A doubled hem, a lining or a strip added to one edge can also change the weight and shape of the piece. Start with plain samples cut to the same size and then move to assembled panels that share the intended construction. Mark their orientation on the reverse, outside the area you want to inspect. If one finished sample looks longer, check the cut dimensions and the free length below the clips before deciding how much of the difference belongs to the printed area.
Hang the three pieces from the same height and leave their lower edges free. Use the same number of clips at corresponding distances from the sides. First observe the unprinted piece. Note where it starts to curve, whether its edges turn inward and how the hem falls. Then use the same observations for the solid band and the segmented print. A panel with a solid band may appear flatter through that area or begin to fold at its edge. On the segmented print, trace where the first fold sits in relation to the bare spaces. Record what is visible before deciding whether that appearance suits the garment.
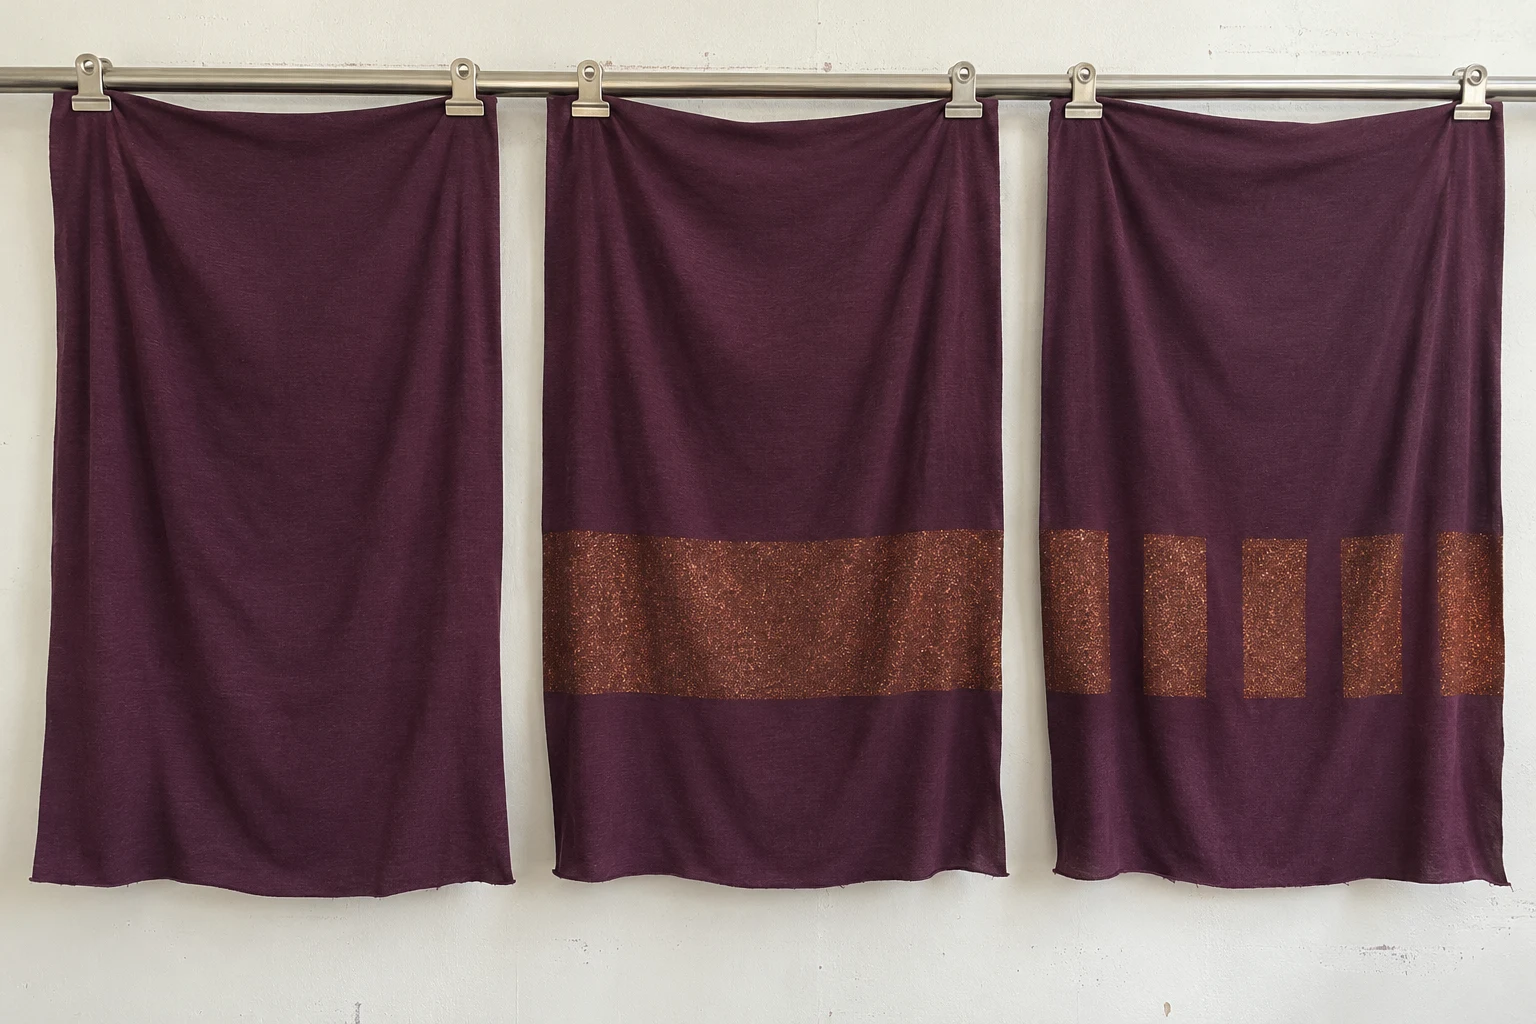
Swap two of the samples after the first look and see if the difference follows the fabric. One clip can hold a panel more tightly or one end of the rail can be closer to moving air. Keep the viewing position and light stable. A bright patch of glitter can make a panel look flatter in a photograph even when the cloth continues behind the reflection. Looking from the side or placing a plain matte background behind the pieces can help reveal the edge. Use the same position for the front and side views of each sample when documenting the comparison.
Next, rest each piece over the same broad rounded support. Compare what happens when the centre of the bend lies beneath the solid band and when it lies at a gap between the blocks. Let the fabric rest on the support with little tension. You can observe where the print follows the curve, how the edge of the band changes the fold and where the fabric falls after it is released. Use similar handling for each sample. If the project calls for a measured bending property or a durability result, agree on a separate test with the technical team. The simple bending proof helps select a layout for that review.
Look at the transition between the print and the plain cloth. A piece can hang freely along most of its length and still show an abrupt change at the edge of a band. Trace where the crease deepens or becomes flatter. With separated blocks, observe how much of the gap actually contributes to the fold. If the neighbouring blocks start to turn together, the visible gap on the design may have less effect in the draped piece. Before reducing the entire printed area, consider whether moving the gap or band away from a specific crease would give the cloth more room to bend.
The lining, seams, gathers and finished edge can change the behaviour you saw in a small hanging sample. If the print sits near the hem of a top, prepare a section with the intended hem finish and dimensions. Check it hanging first and then in the position it will take during normal movement. A band that looks straight through the front can slip into a deeper fold at the side. Note which area is expected to stay easy to read and which can move more freely. A cut panel and an assembled one can show how much the finished shape contributes to what you see.
Once you have identified the part of the garment that bends most, compare two placements of the segmented motif. For example, align a gap with a vertical fold at the side on one trial. Move the pattern a short distance on the next trial so a block sits over that fold. Use the same band of fabric and keep the garment shape consistent. That lets the team see if the change in position improves movement, preserves the intended appearance or does both. If different garment sizes put the fold in different places, repeat the check on the size where the relationship is likely to be most demanding.
Review the shape under light that makes the folds easy to see. Then look at the glitter effect under conditions closer to the intended display or use. A solid band may reflect over much of its width, while only a few of the smaller blocks flash at once. If a gap helps the fabric curve but makes the band look interrupted from a distance, the team still has a choice to make. An adjustment to the height of the band or to the size of the spaces can be trialled without changing every part of the design. Keep the earlier sample close by.
Record the cloth code, the motif layout, block and gap dimensions, print base, any underprint, direction, date and garment section. Add a picture that locates the relevant fold if it will help someone recreate the view. Keep enough unprinted fabric above the application to hang the selected proof again. The instruction “the side fold falls between the second and third blocks” points to a check someone can repeat, while a general note about softness leaves the location open. If formal measurements are needed, agree on the preparation, direction and acceptance criteria with the relevant team. Refer back to the physical proof that led to the request.
Take the unprinted control, the two print layouts and the actual-size piece into the final review. Observe the fold and the visual rhythm of the glitter before deciding how much of the band should remain continuous. If the project is still deciding between finishes, the comparison of glitter and foil printing on fabric explains the two visual effects. Once the glitter has been chosen, keep the design that meets the appearance and movement requirements on the actual fabric. The retained sample gives the next reviewer a way to check the same fold when the cloth, layout or garment shape changes.
phone: +90 212 576 5250
fax: +90 212 493 0336
email: info@unlutransfer.com
Yenidoğan Mah. Eser Sok. No: 6-8
Bayrampaşa, 34030,
Istanbul / Turkey
TR 9150171175
Bayrampaşa Tax Office