For quick contact: +90 532 288 2200


Identify where the garment stretches. Compare a solid stripe and a segmented foil motif on the actual seam, during movement and after release.
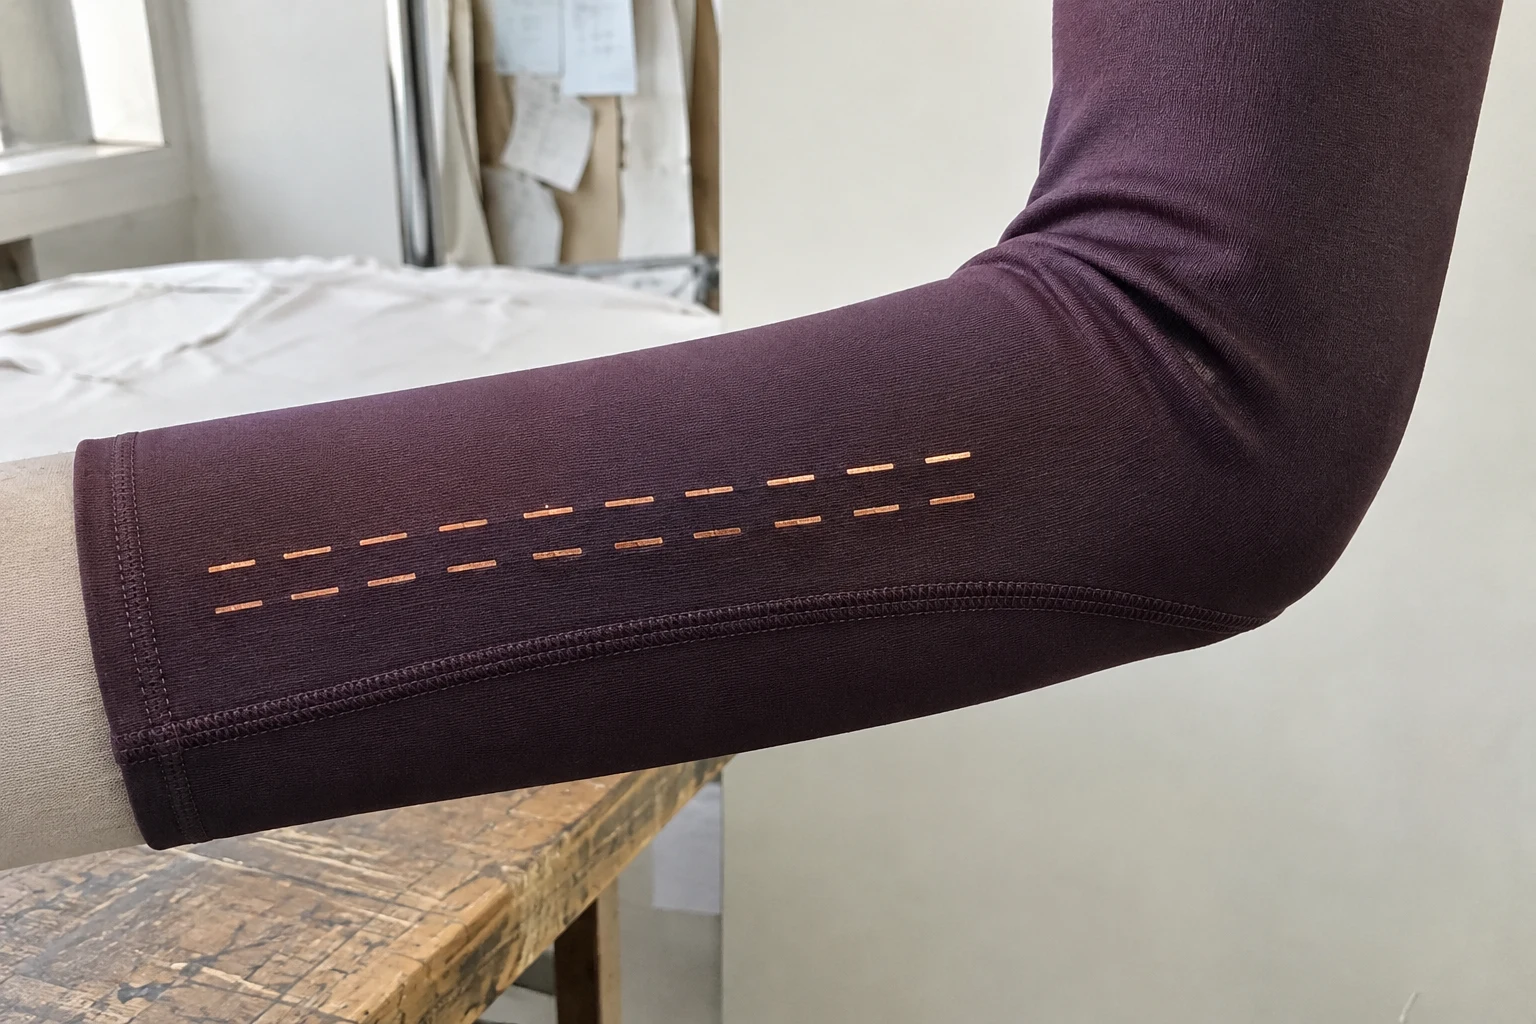
Start by finding where and in which direction the garment moves. Compare a continuous foil stripe with a segmented motif on the actual stretch fabric. Inspect both at rest and while reproducing the movement expected in use. After releasing the fabric, look again at the shape of the motif, the seam and any change left on the surface. This comparison helps you decide whether to move the motif, break it into shorter elements or leave more space next to the seam. Confirm the choice on the cut and assembled part where the design will actually sit.
Imagine a copper-toned stripe on the outside of a sleeve running towards the elbow. On a straight arm the line sits where it was drawn. As the elbow bends, one part of the knit opens while another folds. The seam can change its angle in relation to the stripe. Decide which part of the design needs to be visible while the sleeve moves. The decorative emphasis may belong on the forearm. In another design, the line needs to suggest a continuous direction on both sides of a seam. Those choices call for different observations on the same garment.
Mark the intended position of the foil on the pattern. Near an elbow, knee, shoulder or cuff, look for the area that stretches and the area that gathers. Use a sample that represents the relevant part of the garment as well as the flat pattern. At the elbow, fabric on the outside of the bend can lengthen while the inside folds. Show where the design sits relative to each area. Write down the panel direction and the orientation of the motif. A stripe parallel to a line on the paper pattern can look different once the sleeve is curved.
Take an undecorated piece from the same lot if possible. Cut it in the same direction as the piece you will decorate. Lay both with the same face visible. Examine the plain cloth first and mark where it opens or folds under the intended movement. Return to the corresponding point on the decorated piece. A fold that also appears in the plain fabric supplies context for what you see. An additional wave or mark beside the foil is a separate observation. If one piece is sewn, keep a matching sewn control wherever the construction matters to the movement.
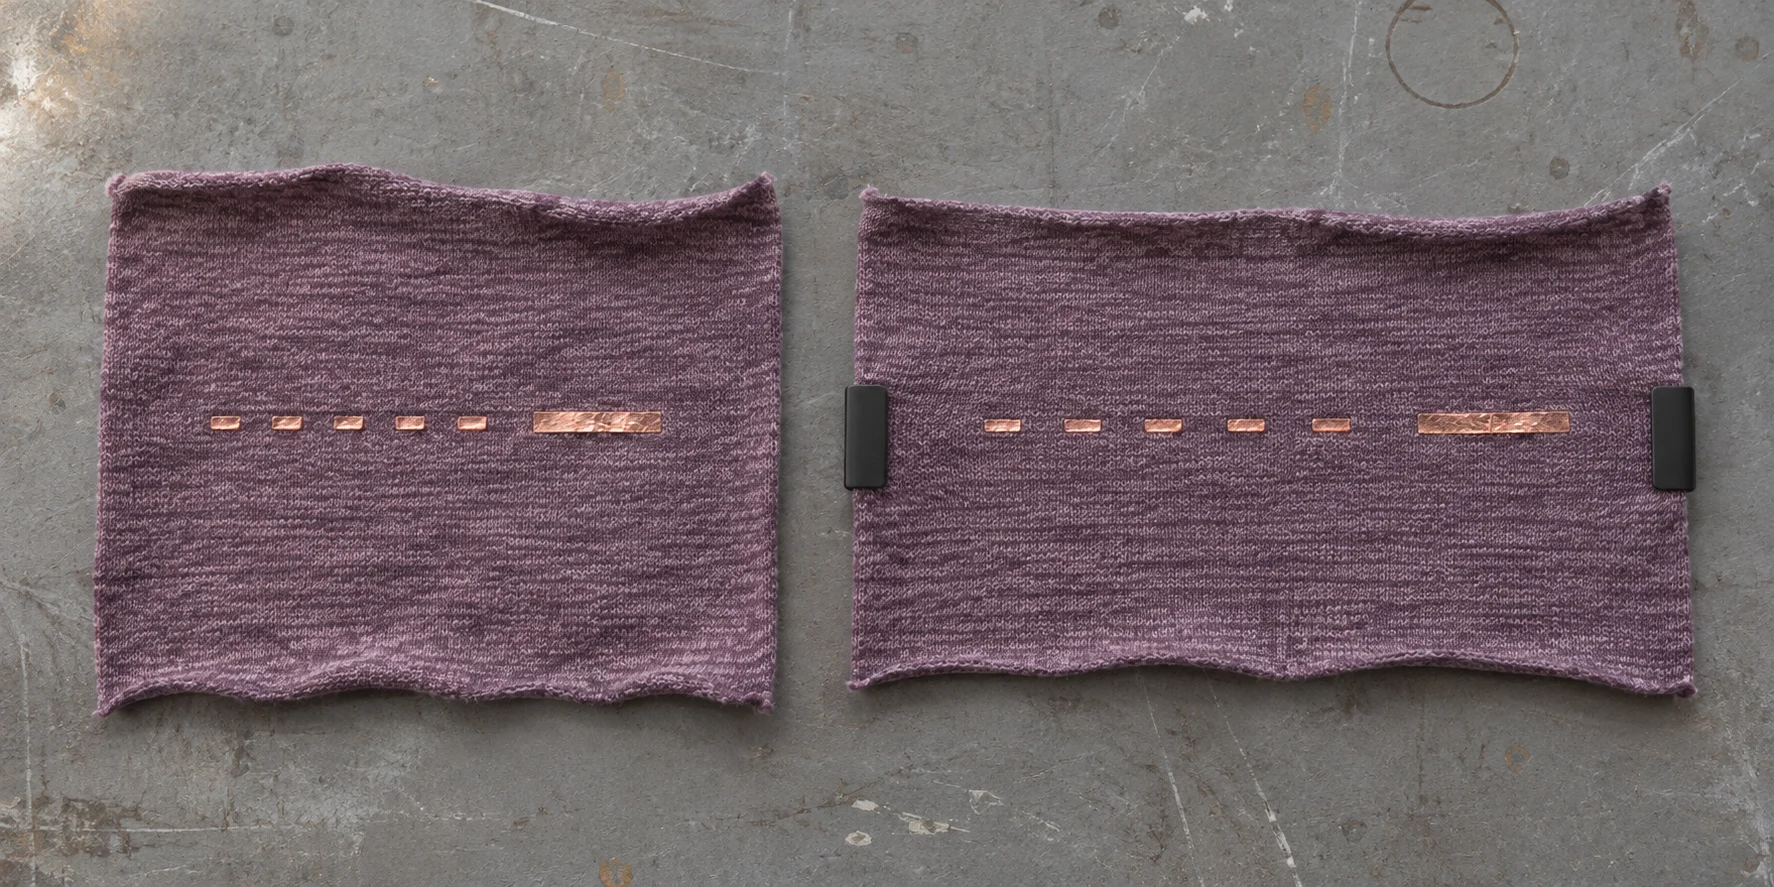
Compare the length and width directions on the bench before deciding how to orient the design. On a knit, the wales and courses help you identify those directions. If the stripe runs diagonally, inspect it in that direction as well. Use a movement comparable to the intended use of the garment. Marks outside the printed area help identify which part of the cloth changed shape. The bench check is a way to locate the area for a design decision. If the order specifies measurable extension or recovery, use the agreed equipment and method for that requirement.
Make one test with the continuous line and one with shorter foil elements following the same route. Keep the fabric, foil colour and application system the same. Mark the length and width of the continuous version. On the segmented version, record where the openings fall and which part of the cloth you want to leave free. Use the same panel location for the first comparison. If you change the spacing and the placement together, the new shape may be difficult to interpret. Once you know which motif works at that location, try it farther from the joint if needed.
Look at how much of the panel each option covers. With shorter marks, more fabric will show and the stripe may feel lighter in the overall design. As the knit opens, the spaces can widen and the marks may read as separate points rather than a single direction. The solid stripe may look clear at rest and pick up the line of the bend while the fabric moves. Examine the two both close up and from the normal distance. An open space can be technically clean even when the design no longer reads as a stripe on the finished sleeve.
Try ending the design in a calmer part of the forearm if the elbow area is central to the decision. Recheck what is nearby. A move away from the bend can put the last mark too close to a cuff or change how it sits next to a second print. Mark the original and revised positions on a copy of the actual pattern. Compare them with the sleeve straight and bent, keeping the motif size the same for that trial. This shows whether moving it preserves the arrangement on the rest of the panel.
Take a view of the reverse of the seam as well as the decorated face. Mark the area where the allowance turns beneath the front. Two seams that look similar from the outside can leave different layers under the end of the foil. If you compare two seams on one sleeve, record which one lies closer to the bend and which construction each one uses. When the motif is placed on another size, check whether the new seam shares those details before reusing the approval.
Locate both the visible stitching line and the seam allowance underneath. The allowance can turn towards the foil even when the visible line looks some distance away. Use a small assembled piece with the real layers and allowance as well as a flat trial piece. If the decoration is applied before sewing, inspect it again after the planned seam is made. If it is applied to an assembled panel, reproduce the actual layers under the decorated area. Record the order of operations. The same printed position can encounter a different construction depending on when the foil is applied.

If the line needs to continue across two panels, mark each visible end relative to the stitching line. A part of the motif inside the seam allowance will be hidden once the pieces are sewn. The part in view may meet at a slightly different angle when the elbow bends. Test the join with the intended stitch and fabric directions. A matched pair of short marks can suggest a continuous route without covering the seam itself. Whether that design is right depends on the assembled view. See where each line ends while the sleeve is relaxed and again while it bends.
Test two realistic positions if the pattern allows more space next to the seam. For example, let the first version extend towards the elbow and stop the first mark earlier in the second. Mark the distance from the visible motif edge and note where the allowance lies underneath. Keep the seam placement fixed for that comparison. If the seam itself must move, discuss the resulting fit or construction with the pattern team. If the motif position stays fixed, compare the original stripe with a segmented version in that spot. The sample should show which choice was actually tested.
Take the first reading after application when the sample is ready to inspect. Look for the initial foil edge, the open space between elements and the shape of the seam. If one sample already has a missing spot, record it before the movement trial. If a change appears between printing and assembly, record that stage before bending the sewn piece. Comparable starting views give you a way to tell whether a gap opened during the intended movement or was already present. Keep the original view alongside the one from the assembled sample.
Bend the piece or move it in the way the garment will be used. Look at the same edge and open space as in the first view. Release the fabric and watch how it settles. A space can open while the sleeve bends and return to its starting appearance on release. A visible crease or ripple can remain after the spacing recovers. Note the immediate view and the view after the agreed resting period. Use the same sequence for each version, and record where a change remains visible after the fabric is no longer held.
Metallic reflection can make part of a stripe look dark on a curved surface. Change the viewing angle under the same light and return to that point once the fabric is released. If the metallic appearance comes back with the angle, note the reflection. If you can see exposed cloth or a raised foil edge at the same location, photograph it without pulling at the surface. Include the seam and an intact part of the motif in the view. That helps the next person tell whether the mark follows the shape of the foil or a fold in the garment.
When you need to repeat the movement, describe the starting position and the movement used. One sample held in a normal bend and one pulled much farther will be hard to compare. If the product has defined extension, recovery or repeated-use requirements, use the specified evaluation method. A workshop comparison should say which garment position it represents and when the image was taken. Record both the change during movement and the result after release. Someone reviewing the next print can then reproduce the view and check the same edge.
Keep at least one view of the entire sleeve with the close-up of the important space. A small gap between copper marks may look generous at close range and make little difference to how the motif reads from farther away. The full view also shows whether the move towards the cuff changed the balance with the rest of the garment. Mark which pose was used for each review. This makes the record useful to both the person updating the pattern and the person checking the next sample.
Keep the fabric article, foil, adhesive system, pattern direction, size and seam allowance with the accepted sample. Mark where the foil starts and stops, where the garment bends and where the distance to the seam was measured. Include the flat, moving and released views. If you select the segmented version, record the gap that was kept. If a solid stripe was approved, keep the assembled view that supported the choice. Where approval involved a small flat card, verify the placement again on the part before cutting the production quantity.
Another garment size may bring the first mark closer to the elbow even if the motif has the same dimensions. Choose the size where it comes closest to the bend and repeat the assembled comparison there. For left and right sleeves, check which side of the seam receives the first mark on each. If the fabric quality, foil or pattern changes, record which part of the movement trial needs to be repeated. When planning foil printing on fabric, share the full-size design, fabric direction, joint and seam positions, and the part of the motif that must remain visible in use. Retain the accepted physical panel with the latest placement drawing.
phone: +90 212 576 5250
fax: +90 212 493 0336
email: info@unlutransfer.com
Yenidoğan Mah. Eser Sok. No: 6-8
Bayrampaşa, 34030,
Istanbul / Turkey
TR 9150171175
Bayrampaşa Tax Office