For quick contact: +90 532 288 2200


Compare an untouched piece, an unfolded sample and a sewn sample cut from the same fabric. Check relief, lines and sheen under the same light.
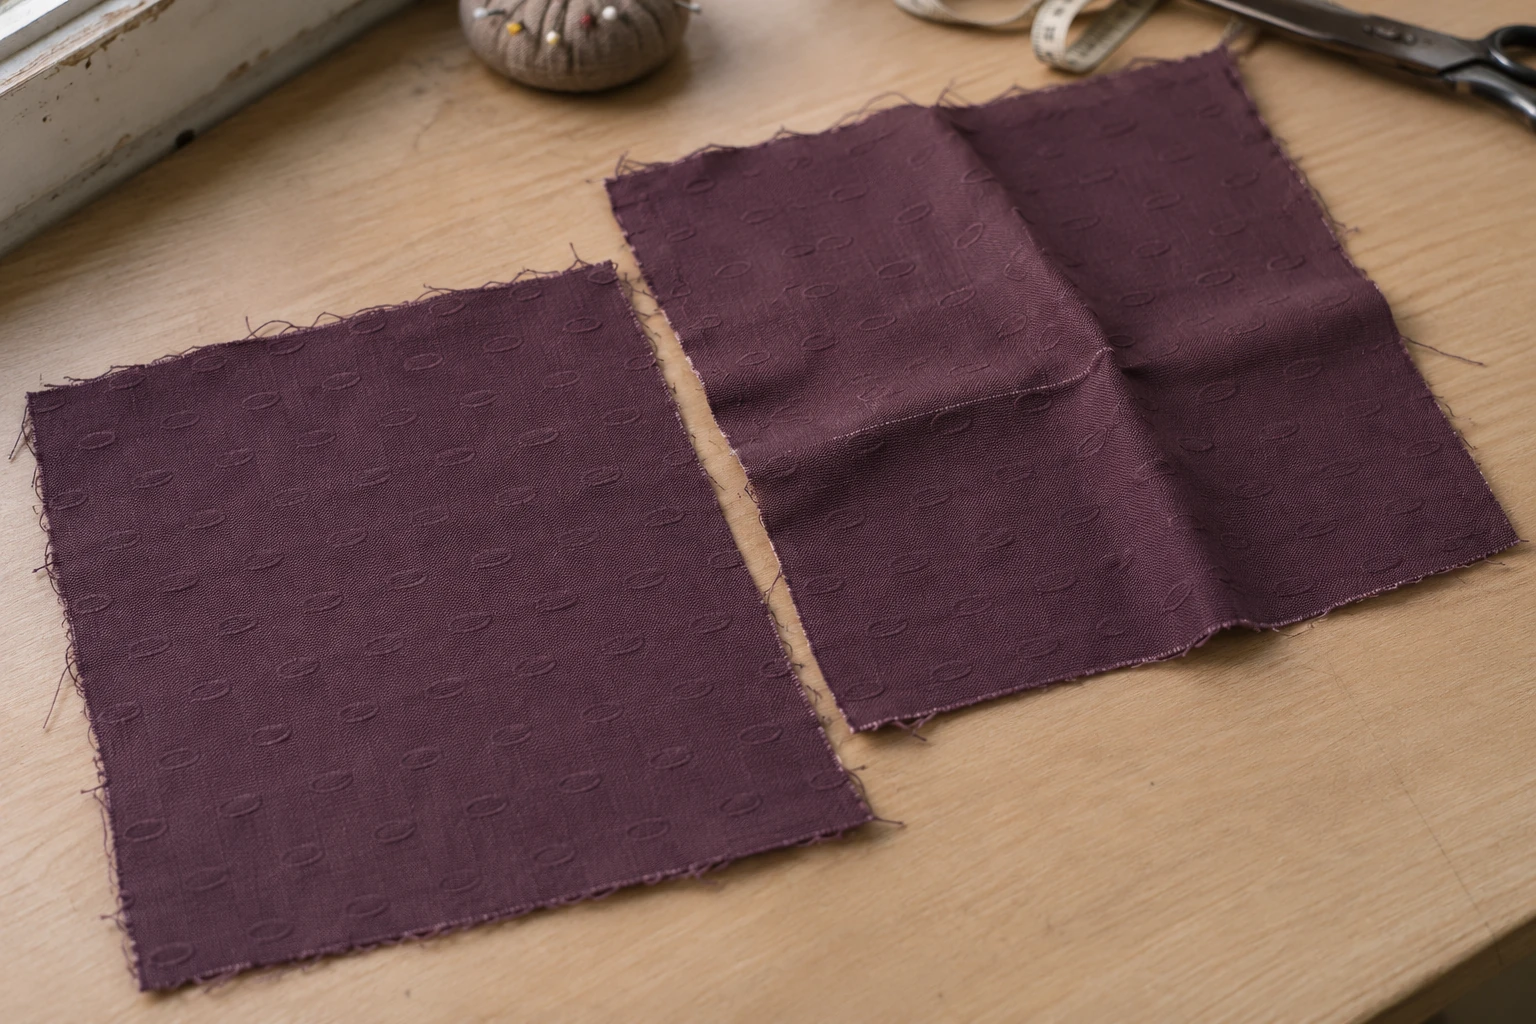
To identify a line on embossed fabric, compare where it appears, what happens to the surrounding relief and when you first saw it. Look for a fold mark at the line along which the fabric was folded. Check for a seam allowance impression beside the join, where the edge of the allowance sits under the face fabric. Keep a flat reference cut from the same cloth beside the folded and sewn samples. Start with the fabric face up, the pattern pointing the same way and the light coming from one side. Then look inside the seam and see what lies beneath the line. Record the line, any loss of definition in the relief and any change in sheen separately.
Imagine making the front of a jacket from cloth embossed with small ovals. On the fitting table, a short line appears near the collar and a longer, faint line runs beside the side seam. Notice where each line begins and ends. The mark near the collar may cross several ovals where a fold was opened. The line beside the seam may move farther from the stitching where the allowance widens. Those clues tell you where to look and which step to repeat. Compare pictures taken after cutting, after sewing and after pressing, so you can establish when a change became visible.
Choose nearby areas of the cloth for the reference, the fold and the seam. Check that the visible faces match, the motifs run in the same direction and the relief looks similar before you start. A seam sample will usually have two individual pieces. Mark the direction on both before sewing. If the sewn motifs run in one direction and the reference is turned around, the light can cast different shadows. Put the sample identifier on the reverse or near an edge away from the area you will examine.
Leave the reference flat and free of pressure. Prepare the fold sample with the direction and location proposed for the product. Make the seam sample with a join similar to the one you plan to use. A single layer of cloth leaves out the bulk of a facing, lining or folded allowance. Include the layers that will be present in the final piece if they can affect the area under review. Record the width of the allowances and whether they are pressed open or lie to one side. Two seams can leave quite different surface impressions even when they are cut from the same fabric.
Photograph the pieces before handling or sewing. Save an overview and a close view of several motifs you can recognise again later. Note any crease near a cut edge, isolated raised thread or difference in relief that you can already see. Keep clips and sample labels clear of the comparison area. If pieces overlap in an overview, observe the raised surface away from any edge underneath. You can also move each sample separately into the same place on the table. Keep a view of the reverse to help identify the pattern direction when you turn the seam over. If the production seam crosses an oval, make a sample that captures that placement. A second seam running through a gap between motifs may look different on the garment.
Match the fold direction to the intended product. Record which faces touched, what supported the fabric, how long it stayed folded and what load, if any, lay on top. A crease formed over a firm edge can look different from one formed on a yielding surface. If the product will only be folded while you handle it, use a comparable step in the sample. Keep the recorded duration and load with the example they describe. A setting used with one fabric gives you a comparison under those conditions.
Once you open the fold, lay the cloth on its support without stretching it. Trace the line first, then look at an oval that intersects it. Compare the same edge of the oval just beyond the line. If the raised part looks less distinct only within a narrow band, note where the band begins and ends. Sometimes the cloth sits at a different angle where it has been folded, so it reflects more light. Change your viewing angle and see whether the line still coincides with a less distinct part of the motif. You may see a sharp kink, a broad tilt on either side of the crease or a narrow change in sheen.
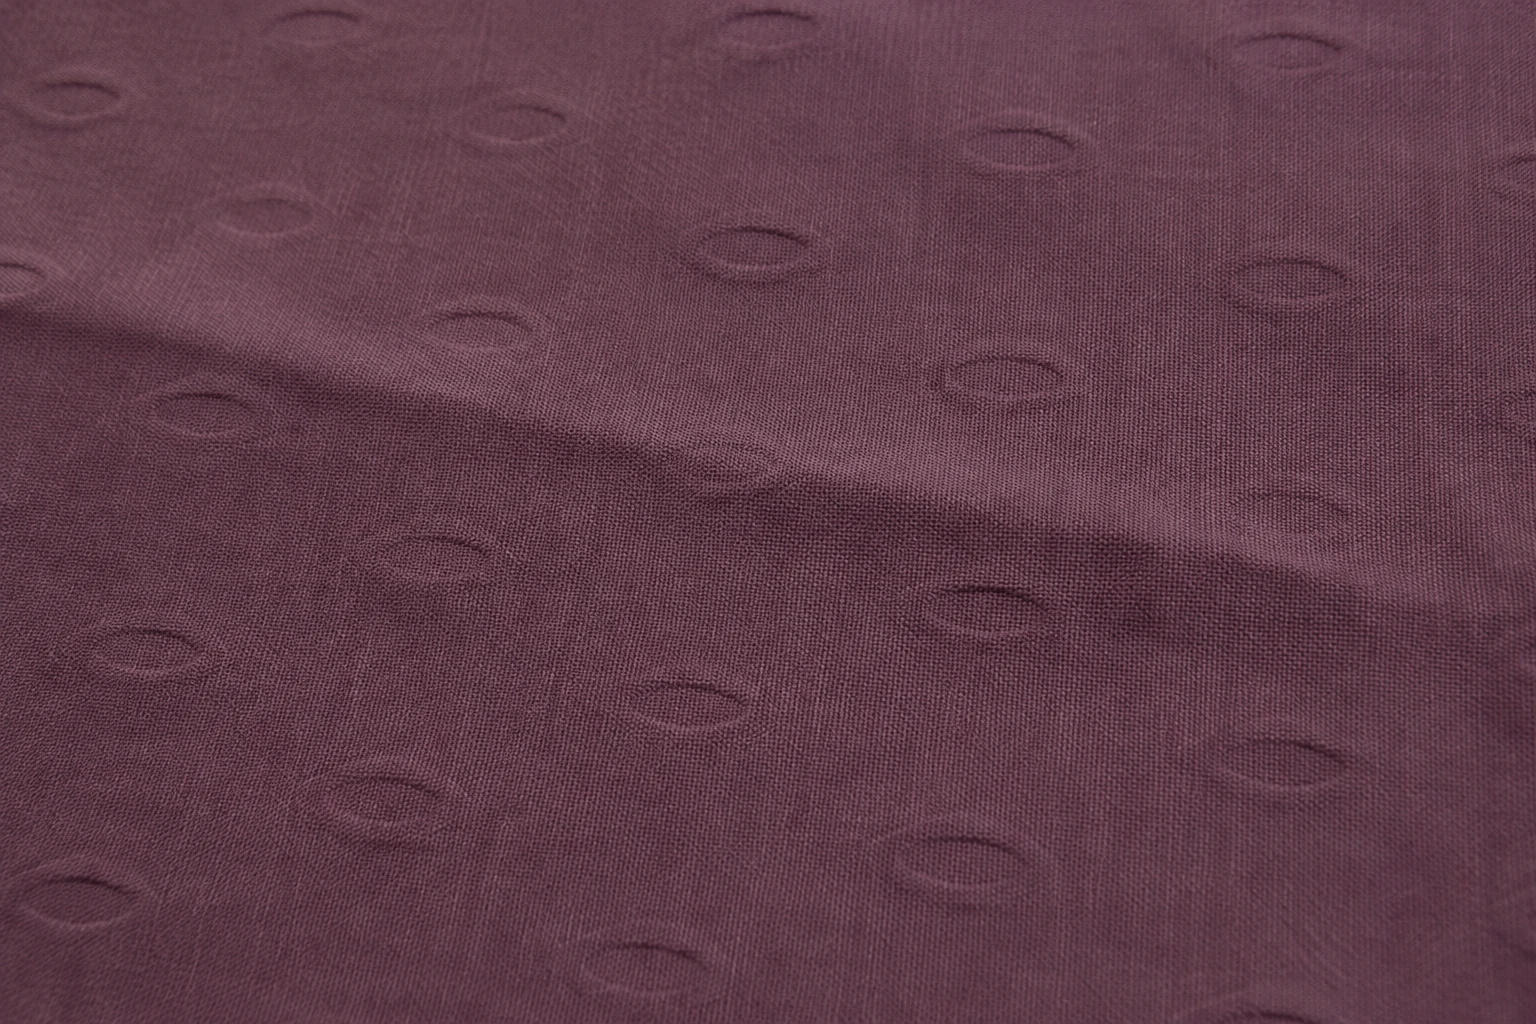
Look as soon as the fabric is released, then again after the sample has rested for the time agreed for the review. Keep the light, orientation, support and camera angle comparable. An obvious line straight after opening can become fainter. The fabric near it may settle while a subtle line remains. If you still see a change at the second review, specify which feature remains and from which side you saw it. For example, a line may show under side lighting while the oval outline remains continuous when viewed from above. Note the elapsed time and whether the piece was left flat or moved between observations.
If the line coincides with a mark on the table or the edge of a cutting mat, slide the fabric onto an open part of the bench without turning it. See if the line travels with the cloth. Compare the same ovals that intersected the line in the first view. Near the end of a fold, a clip mark or a crease from the edge of the piece may cross the main line. Locate the start of each mark and record them separately if they cover different areas. If you need a pointer, put it beside the cloth or annotate a copy of the overview to keep the surface clear.
Examine the same area after cutting and after sewing. If the production method includes pressing, examine it once more after that step. A line seen where the pieces join is in a different place from a line that follows the outside edge of an allowance. Mark the two separately in your notes, including any waviness that already appears after sewing. Look inside to see whether a straight line that appeared after pressing follows the edges of the allowances. Check where other layers such as interfacings or linings end. Support the sample while you turn it over so you can recognise the position without pulling the face taut.
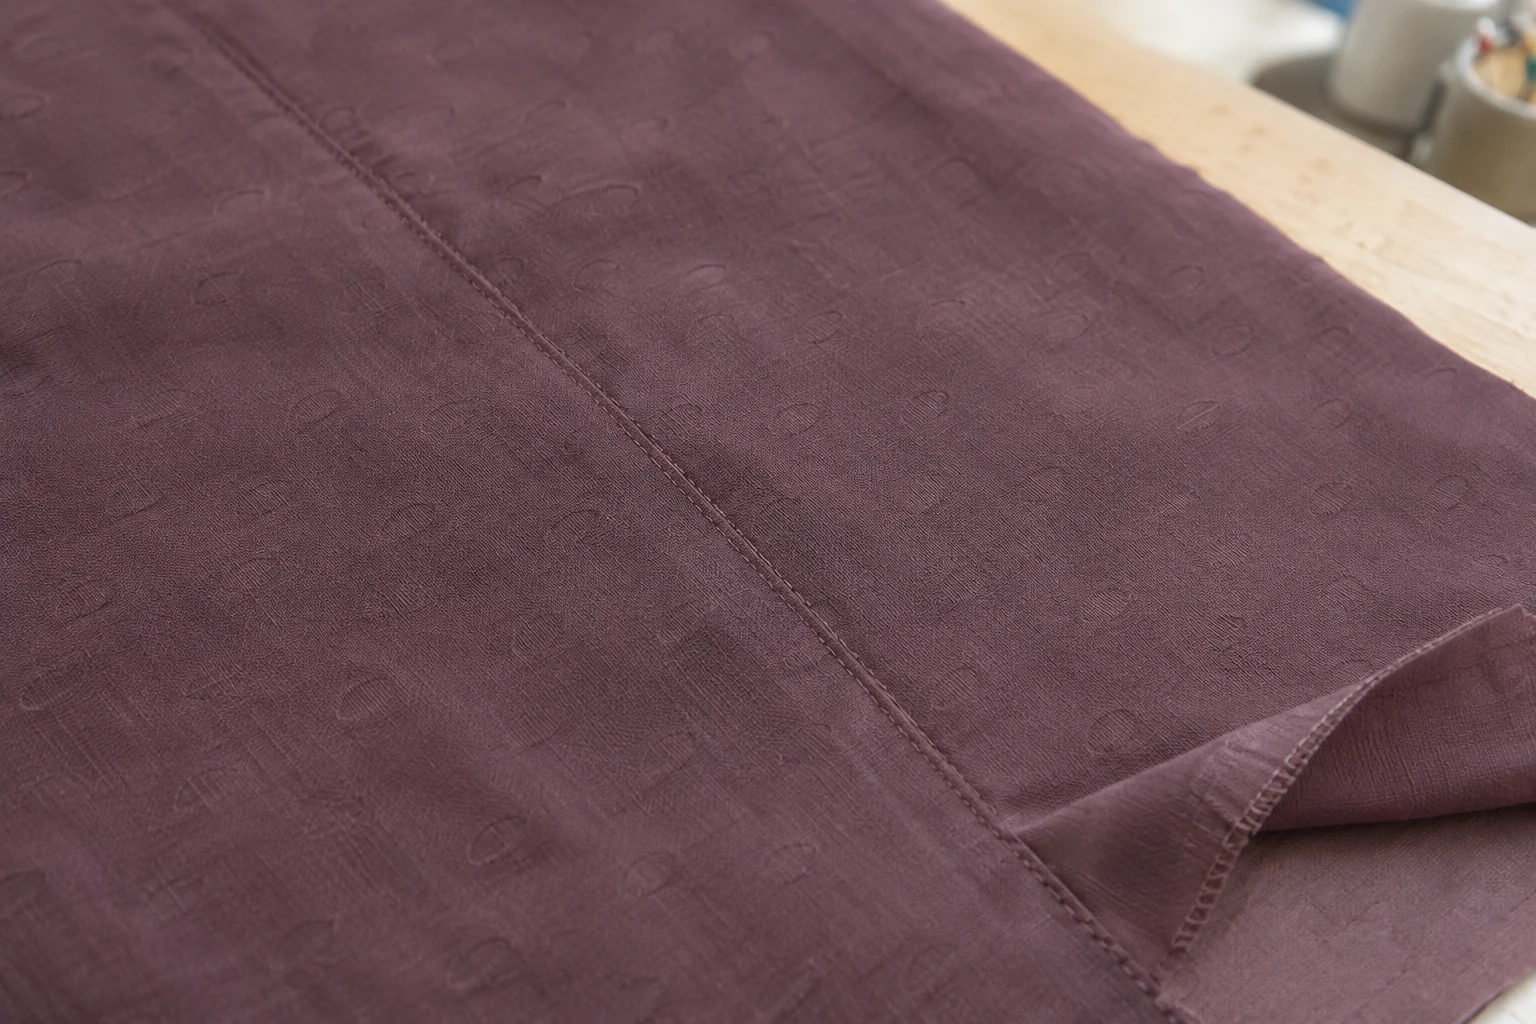
A join may look even while a faint parallel line appears beside it. Pick a distinctive oval as a reference and follow its position when you turn the cloth over. Check whether the allowance widens as the line moves away from the join. If the line continues across a place where the allowance ends, check the same area for an earlier fold or another layer. On some samples the motifs may become less defined over a wider band without a visible line at the allowance edge. Record puckering along the stitching, loss of definition around the motif and a narrow shiny line as observations in their own right. Include when each first appeared.
If you want to compare changes to the construction, alter one part of the setup at a time. You might prepare matching seams and change the support for one pressing trial. Test a different allowance arrangement on a separate pair. Where appropriate for the fabric and construction, check whether a narrower support or a suitable press cloth changes the face appearance. Use pressing conditions appropriate for the cloth and the other materials in the seam. Record the actual heat, moisture and pressure conditions used as far as your setup allows. If the first trial changes the relief, use a spare piece to check any further adjustment before pressing the finished sample again.
After comparing the samples flat, view the seam as it will sit in the finished garment. A faint line on a bench may become more visible when the light reflects off a curved shoulder. An allowance that shows clearly from overhead may be less apparent when the panel hangs naturally. Use the same position on the garment for both samples and observe it at the distance used to review the finished piece. Record the location in relation to a fixed feature, such as the collar, side seam or hem. The next fitting can then return to the same place. Check the region from more than one angle when it will catch the light during wear.
With soft side lighting, compare the shadows around the crest and recess of the same motif. Next, change your viewing angle without changing the support, or look again under diffuse light. The whole oval may still look well defined even though a thin shiny band appears at certain angles. Another sample may have a group of ovals with fainter outlines next to the line. Use a description that identifies what you saw and where, such as “narrow sheen beside the allowance under side light” or “less distinct oval edge where the fold crosses it.” If one piece is closer to the window, swap the positions while keeping the fabric direction fixed to see whether the change follows the sample.
If a height value is needed, select a suitable surface profile method and choose equivalent parts of the motif for measurement. Total thickness measured under a defined load describes a different property. A photograph records shadows and reflections that depend on the lighting and the camera. Keep the wider view with the close one so another reviewer can recognise the location and the setup. If two people see the line most clearly in different places, locate both on the physical sample and check at the same angle. Record the view where the observation is repeatable and identify which distance was used.
The fold and seam samples can also help you compare how wide the visible change is. On the folded sample, several ovals may be interrupted along a narrow line. On the sewn sample, the area that catches the light may extend across several rows next to the allowance. Mark the ends in an overview and check which feature is visible first when you look at the full piece. Keep the same viewing distance in later trials. You can then check whether an adjusted seam reduced a narrow line while leaving a wider shiny area, or whether both observations changed together.
In the sample record, include the fabric face, motif direction and the point in the process where the line first appeared. For the fold, document how it looked just after opening and after resting. For the seam, include the shape of the allowance, the support used and what the face looked like before pressing. Keep the overview and close views together. State whether the line is visible with the product in its usual position. If the same cloth is used in two designs, identify which panel and construction the result applies to.
If the fold mark is in a place you can change, try a different fold position or direction on the same material. If the line matches the allowance, prepare a new seam to check one change to the support or the position of the allowance. View the new piece under the same conditions as the original. Record which appearance the reviewer accepted and for what area of the garment. The next time a line appears on a jacket, skirt or panel, you can return to the same face, the same point next to the join and the step at which you first noticed it.
phone: +90 212 576 5250
fax: +90 212 493 0336
email: info@unlutransfer.com
Yenidoğan Mah. Eser Sok. No: 6-8
Bayrampaşa, 34030,
Istanbul / Turkey
TR 9150171175
Bayrampaşa Tax Office