For quick contact: +90 532 288 2200


Draw the finished fabric face at full size. Specify the ground, the relief areas, the edge transitions and the gaps that need checking on cloth.
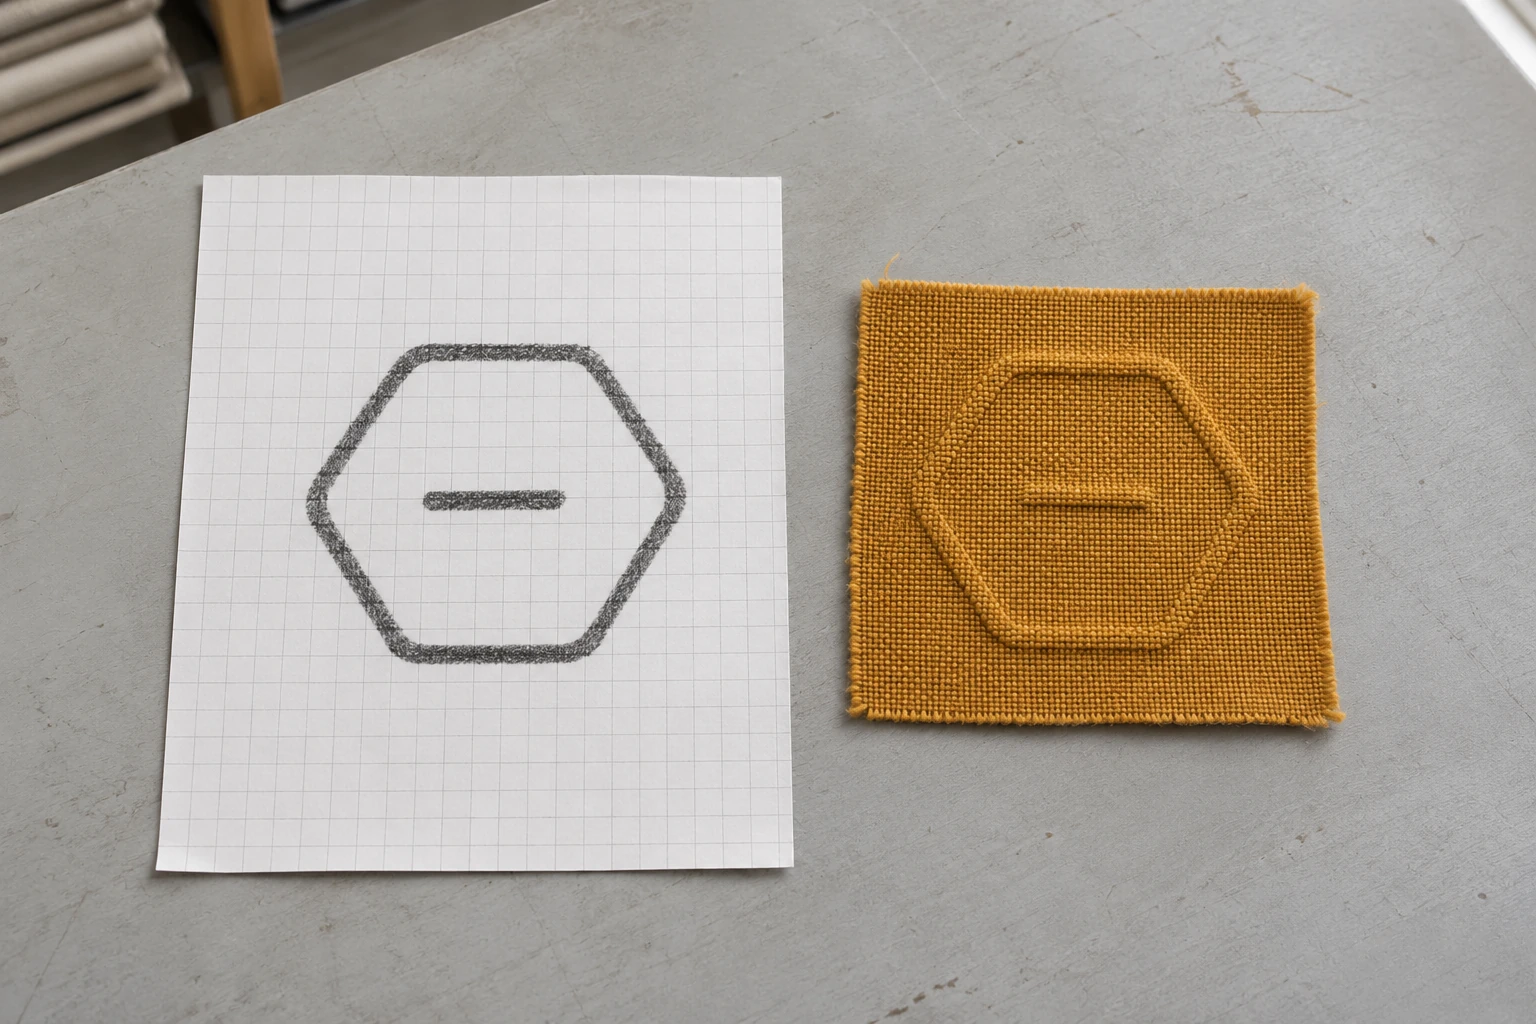
Start with a full-size top view of the intended visible face of the fabric. Identify which areas stay at the ground level and which rise or fall. Draw a section through an important edge and the gap next to it. Use the section to show where the height changes and how the surface should transition. Tell the supplier which dimensions must be kept, which gaps must stay open and which alternatives can be sampled. The drawing of the finished fabric and the drawing used to make the tool may be separate. Give each its own reference so the desired shape on the cloth stays clear.
Imagine a rounded hexagonal frame with a short horizontal line inside it, on an ochre fabric. The two elements may have the same dark colour in the artwork. On the cloth, the frame can rise above the surrounding ground, the line can be a shallower ridge, and the cloth between them can stay at ground level. The single flat drawing does not establish those relationships. The top view locates the line inside the frame and shows how close they come. The section explains how the surface rises from the ground to both features. On the sample you can then check whether plain cloth remains visible between the features and whether the outside corners have the intended shape.
Draw the fabric as it will be seen on the product. Give dimensions in an explicit unit, such as millimetres. Identify the widest part of the motif, the width of the outline and the location of the inner line. An enlarged view helps discuss the shape, while the dimensions give its production size. If the motif is directional, show which side faces up on the product and mark the fabric length direction. If the hexagon should have a flat side at the bottom of a flap, keep that orientation in the top view and on the sample card.
Open or print a full-size check and confirm its dimensions. A shape shown at 36 mm in the file may be smaller if the printed page has been fitted to the sheet. If the print and drawing dimensions disagree, identify the production version before sending it on. An example might be a hexagon 36 mm wide and 32 mm high. Show whether those numbers are taken between points or between straight sides. Locate the short line from a named edge or axis. For a repeating motif, give the full motif size and the repeat spacing separately. If it appears only once, specify its placement on the product panel.
Read the flat artwork as a set of areas. A line around the frame may describe the width of a raised strip or the outside boundary of a larger raised surface. A stroke left as a centreline can also make the resulting width ambiguous. Identify what the line represents. If an inner mark is only a visual alignment guide, keep it separate from the geometry to be formed on cloth. If it belongs in the design, give its position and width. Separate dimensions and production notes from the shapes to be made. Another reviewer should be able to tell which elements describe the fabric and which explain the drawing.
If the same motif points in different directions on two product parts, include a placement view for each. Leave a clear face reference on the check print. Specify the measuring points for the overall size and the location of the inner line. Revise the top view if a change to a corner or a gap also alters the usable dimensions of the motif.
Choose the surrounding flat cloth as the reference ground. Identify it as the zero level in the description. Mark a frame that rises above it and specify if the short inner line should rise less. Indicate where the fabric stays at the ground level between them. In another design, part of the motif may go below the ground. Show the downward direction in section and name the intended finished face. If your plan uses colour, give each colour a meaning. A dark line used in a flat design does not by itself say whether it will rise or sink.
Place a section line between two points in the top view and indicate the direction you are looking. One section from outside the hexagon towards the centre can show the outer ground, the high frame, the intervening ground and the shallower line. If the main section misses the rounded corner, add a second one through that area. Specify whether the inside field stays at the same level as the outside field. The same fill colour in the top view may have been used for both even if the designer intended them to sit at different levels.
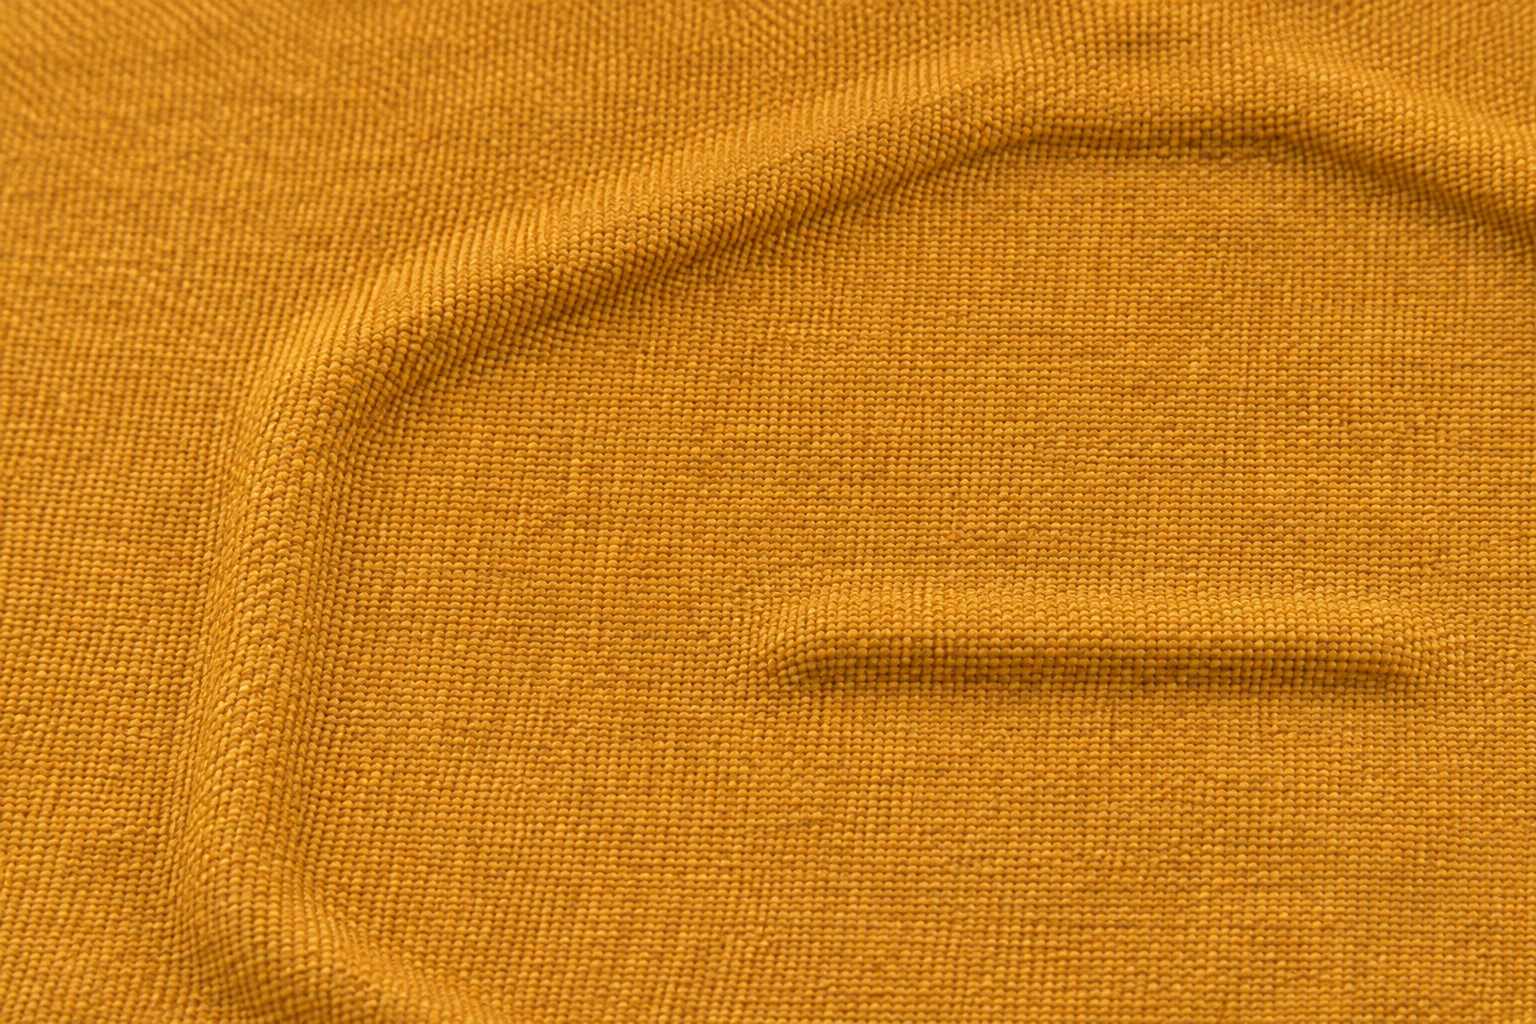
Describe the shape of the transition. An edge that looks steep in a drawing can form a broad slope on cloth. Show where a rounded transition starts and ends. Check whether the real slope leaves the intended open ground between neighbouring shapes. If you have a required local height, agree where and how it is measured from the finished cloth’s ground. Overall fabric thickness and the engraving depth of the tool are separate quantities. If the height has yet to be decided, specify the order of the levels and what the sample needs to show. Keep proposed dimensions apart from measured ones.
Keep the orientation in both views. If the section is laid out horizontally on the drawing but follows the length direction of the cloth, specify that direction. Mark the same corner and boundary in the sample photograph so another reviewer can find that transition. A top view at a readable scale and a close profile view show different aspects. Keep them together and link both to the version of the physical sample. If the supplier modifies a sharp junction or rounds a corner, identify the change in the drawing and check the nearby gap again.
Use a section that crosses the details the supplier needs to see. A section through a straight part tells you about the straight ridge but can miss the way the slope changes near a corner. Where the corner affects the gap or the visible outline, show a second section and the line it follows on the top view. Name both views so the reviewer can match them to the same two places on the cloth.
Mark the narrowest gap between neighbouring features in the top view. Define the two edges that bound it. The distance between the centres of two ridges differs from the width of the flat cloth between them. Show the slopes in section as well. If a transition spreads farther on the actual fabric, less plain ground may be visible even when the ridge centres stay in the intended places. If visible ground matters to the design, include it in the sample review criteria.
For example, plan trials of a 2 mm, 3 mm and 4 mm gap on the same fabric. These are example drawing dimensions. The smallest useful gap depends on the fabric, the geometry, the transition and the process. Keep the frame size, width of the inner line and fabric orientation fixed as you change the distance of the line from the bottom edge. Check whether this also changes the closest distance to either angled side. Mark the control point in each drawing and note any other variable that had to change. If a sample is described only as having a wide or narrow gap, it can be hard to identify which geometry produced it.
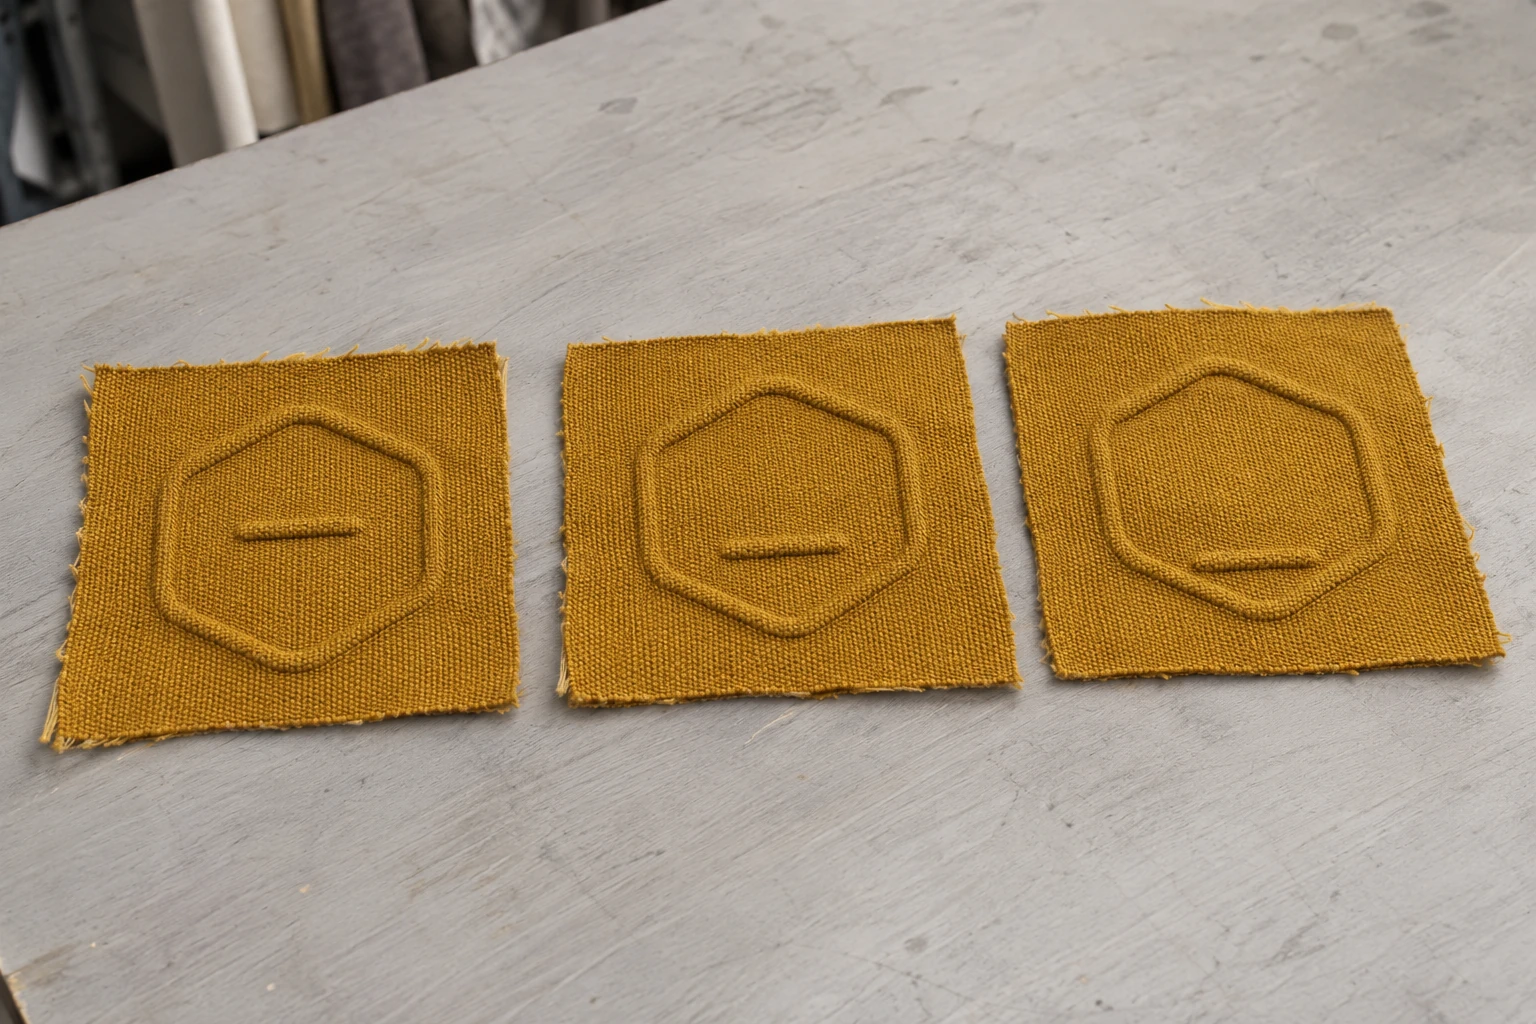
Look first at the outside frame, then at the tip of the short line and the cloth between them. An open gap can look narrow from the side because of the shadows. See whether the slopes actually touch by looking down under diffuse light as well. If the line and frame must read as separate shapes at the usual viewing distance, record that observation beside the dimensions. Use the product shape in a second view if the fabric will sit on a curve. A close image from the bench gives little information about which edge remains clear when the product is handled.
If the same transition could not be made in all three trials, note what changed. A narrower gap and a softer slope can both affect how much space remains visible. Keep a sample of each version and agree which condition to hold fixed at the next trial. If the artwork will run on two fabrics, record the gaps for each material. Verify the chosen separation again when the base weave, handle or finish changes. A revision can preserve the outside shape while moving the inner line. State which characteristic is fixed and which one the supplier can adjust.
Lay out drawings of the gap variants side by side at the same scale. When reviewing the returned samples, identify the control point on each photo and label the fabric, orientation and revision. If a dimension is under discussion, state whether it came from the drawing or was measured on the fabric. Keep the sample proposed for approval with the exact drawing it represents.
Agree on the file format the supplier uses. Include the single motif, a repeat view if it is needed, actual dimensions, fabric direction, section line and notes. Keep the artwork geometry, dimensions and notes distinguishable. If a revision moves the inner line away from the frame, add the old and new dimensions and identify which geometry stayed the same. Where the supplier works from a different tooling view, compare it with the intended finished face before authorising the next trial. Keep the description of the finished direction with both views.
Use the same revision identifier on the drawing and on the physical sample card. Keep photographs of the relief near the top view and section. Record the base fabric, its intended face and reverse, and where the motif will sit on the product. A close side-lit shot shows the edge transition. A top view makes the arrangement and gaps easier to recognise. Save both at a stated orientation. Keep the original target, the supplier’s proposed adjustment and the final observation on separate lines so a new material can be reviewed against the correct version.
Before sending the file, ask a colleague to describe where the high and low areas lie using the top view and section. If the ground has two names, or two files show the inner line at different widths, align the drawings before the next sample. Give the supplier the features that will be confirmed on fabric as well as the dimensions. Once a trial is approved, keep its response, date and sample identifier with the applicable drawing. If an edge or gap is still to be confirmed, identify precisely where and in which specimen it will be checked.
phone: +90 212 576 5250
fax: +90 212 493 0336
email: info@unlutransfer.com
Yenidoğan Mah. Eser Sok. No: 6-8
Bayrampaşa, 34030,
Istanbul / Turkey
TR 9150171175
Bayrampaşa Tax Office