For quick contact: +90 532 288 2200


Compare the same relief under diffuse and directional light from the intended viewing position. Record the orientation, distance and visible details.
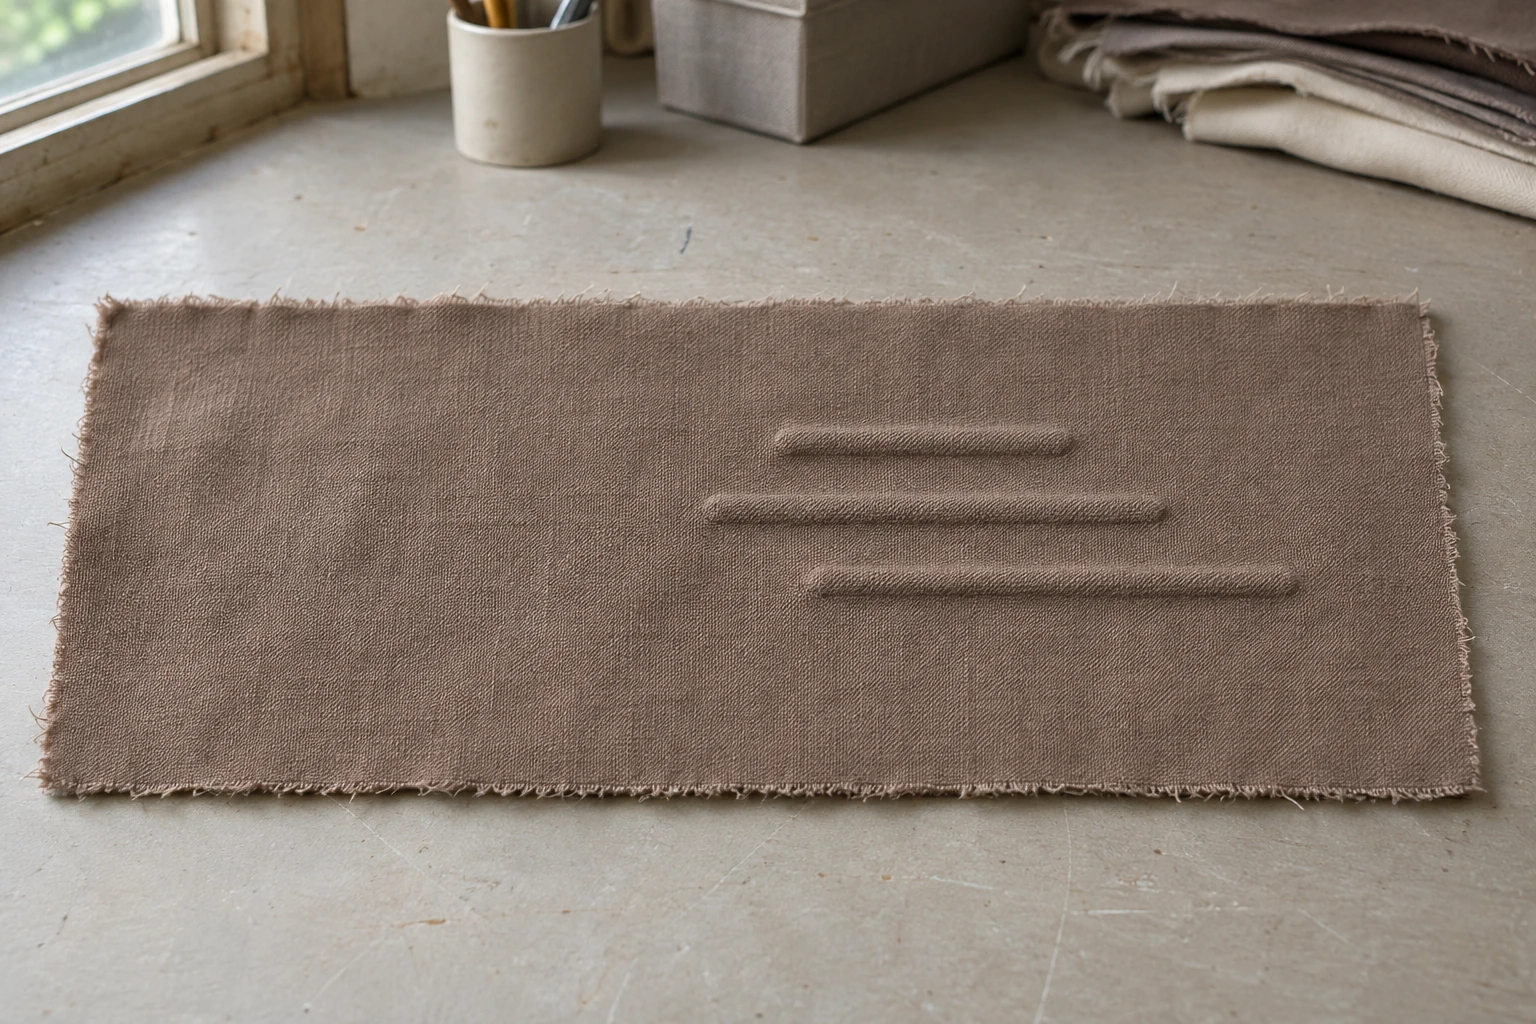
To approve a tone-on-tone embossed motif, begin at the angle and distance from which people normally see the product. Use lighting close to what the piece will receive. Next, change the direction of the light while leaving the cloth in place. Compare a broad, diffuse light with a directional light set low across the surface. Note whether the whole motif is visible and which details fade in each condition. Keep a close view under the low-angle light with a wider view in normal light. Use the expected product view to decide whether the required features are visible.
Imagine three parallel ridges of different lengths in a taupe woven cloth. The ridges and ground are the same colour. When the light crosses the long edges, the three lines may be easy to see separately. When it runs along the lines, their ends may still be visible while the spaces between them receive less shade. Both views can come from the same piece of cloth. When a line appears darker in a photograph, check the lighting and the fabric orientation before treating the change as a difference in the physical relief.
Describe what you want someone to see. On a bag panel viewed at a distance, it may be enough to recognise the shape formed by the three lines. On a collar seen closer, it may matter that the ends are distinct and there is visible ground between the lines. “The three lines should be distinguishable from the front” gives you a specific check. The required detail determines the viewing distance, lighting and photographs you should use to review the sample.
Write down the main viewing conditions. A bag on a display shelf may sit in one position under overhead light. An accessory held in the hand can be tilted. The fabric on a garment can fold as the wearer moves. Choose the most common condition as the starting point and record other important positions separately. If low side light is actually part of the product display, include it as one of the approval conditions. Decide which details must be visible in each position before looking at the sample.
Choose a typical distance and a closer distance for details. Mark the sample position and where the viewer will stand. Let other reviewers describe what they see before telling them what to look for. A person told that there are three lines may search for a faint mark they would otherwise miss. On a sketch of the product, indicate the face, the top edge and the position of the motif. Use those landmarks when you record what people could see.
Tone-on-tone embossing follows the colour of the cloth. The shape becomes visible through differences in shadow and in the way the surface reflects light. Fabric direction can affect that appearance on a pile fabric or a low-sheen weave. If a plain piece of the same cloth is available, place it alongside the embossed sample and orient both pieces the same way. Compare the appearance outside the relief. This can help you distinguish a highlight on the ground from the light edge of a raised line.
Set the cloth down with the visible face up and its top edge identified. Use a flat support for a flat product panel and run a separate comparison on the planned shape if it will wrap around a curve. Mark the top and left on the back or on the table. When light moves to the opposite side, keep the cloth and the viewer in place. You can then see which parts of the appearance change with the source.
Start by looking at the physical sample. Record the number of visible lines, the parts of their outlines you can follow and the plain ground you can still see between them. Then photograph what you saw. Keep the camera position and framing steady for the comparison. Automatic exposure may brighten a darker view or reduce the contrast in a brighter view. Use comparable exposure settings if you can and check that bright and dark areas both retain detail. Record any necessary change. Use the physical cloth to confirm an effect that only seems to appear after the photograph is sharpened or edited.
Give the full view and close view different jobs. The full view records what can be seen from the normal distance. The close view shows where a shadow lies relative to an edge. Save both with the same sample code. Note any change in camera height or direction. A sample photographed from overhead on a table can look different from the same fabric held vertically even if the source stays in place.
If daylight changes during the trial, repeat a view after the change or use a steady light for that comparison. Clouds can soften the shadows. Light from another lamp or a pale wall can lift the darker side. When you compare left and right sources, note which other lights are present. Keep all three ends and some plain ground in the overall frame. In the detail, include the edge you are checking and part of the surrounding cloth. Mark a copy of the picture when you need to point to a location and retain the original image too.
For a diffuse view, use soft light from a broad area, such as a window without direct sun. Look at the whole motif. Can you see all three lines separately? Can you see where the short line ends? Record what you can follow. Next, use a directional light low across the surface. From the same viewing position, compare the lit side of each line with the shade beyond it. Low-angle light can make a shallow relief easier to examine by extending the shadows around it. View that detail alongside the wider assessment in normal light.

Move the light to the opposite side and look at which edges brighten. If the shade moves with the light, include that observation in the record. If the same section looks different from neighbouring cloth under both directions, look at the physical surface there. A fold or a curved end can affect how a line catches light. Place the fabric on the intended support and repeat the observation. Record the part that remains difficult to see across the conditions you tried.
Raise the light slightly if a shadow extends across the next line. Stronger contrast around one edge can hide another part of the motif. Return to the diffuse view and find the same point. If the lines are still distinct and only the edge looks softer, describe that result. If one line fades into the ground, note which part disappears before deciding whether the motif needs to change.
A bright streak can also move along the top of a ridge as the viewing angle changes. Describe that highlight separately from the dark shadow. If the plain swatch shows a similar streak, fabric direction can be part of the effect. For an observation about the relief, look at the middle and both ends of the shortest line. An uncertain end and a whole line that disappears are different findings. If you need a measurement, ask for the height to be checked on the physical piece at the exact marked location and document the reference level.
Leave the source in place and turn the same sample a quarter turn. With the three-line design, the light can cross the ridges in one position and run more closely along them in the other. Compare the two views. If you use two swatches side by side, start with the same fabric, pattern and relief. Check that one swatch is receiving comparable light, then exchange their positions without turning them and look again. Record which piece was on which side each time.

Use plain references when writing the setup. You could state that the top of the panel was far from the camera and the lamp was to the left. When you move the source to the right, add that the panel and camera stayed in place. If someone turns a photograph on a screen, the shadows turn with it. Keep the original orientation in the record so the next person can set up the physical sample in the same way.
Lighting can reach different parts of a curved panel at different angles. On a curved bag flap, the centre line may be apparent and the one closest to the edge may fade. If the flat check is satisfactory, record the curved view separately and indicate where the fabric wraps around the support. Keep a wide image that shows the curve and a close view of the affected line. Compare the two before changing the emboss design or its location.
Record the cloth reference, colour, visible face, grain direction and artwork version. Add the viewing distance and direction, the fabric support and the position of the source. Describe whether it was daylight or a lamp, broad or directional. Record exactly what was visible. For example, “the three ridges were distinct under diffuse light from the front, with the left end of the shortest line easier to identify under low side light.” Use the same sample identifier for the approval record and the files.
State which view determined the decision. If the whole motif is clear in use and a small detail appears only from close up, compare that result with what the product needs. A stronger close photograph may be useful for a catalogue. For a different display with spotlights, review the sample in that light before applying the same decision. If there will be more than one fabric colour, compare each in the same setup and write down what changes. The direction that brings out a detail on one shade may need checking again on another.
For a repeat review, set the lamp and sample where they were for the first photograph. Ask a second person to read the motif before seeing the earlier notes. Compare the outline they could follow and which ends they could identify. If people agree on the main shape but differ on one short edge, keep both observations. This makes it easier for the workshop to see whether a revision helps at the viewing distance of the product or only under close inspection.
Tell the workshop which part and which view need attention. If the short line blends into the ground when seen from the front in diffuse light but its end can be seen under raking light, describe both. Attach a marked copy showing the end you mean. When a revised sample arrives, start from the recorded distance and lighting, then check the other views. Use the original approval as a point of comparison if the fabric colour, motif or support changes, and check visibility again on the finished piece.
phone: +90 212 576 5250
fax: +90 212 493 0336
email: info@unlutransfer.com
Yenidoğan Mah. Eser Sok. No: 6-8
Bayrampaşa, 34030,
Istanbul / Turkey
TR 9150171175
Bayrampaşa Tax Office